Create a tracker artifact whenever you need to report and track a bug, feature request, support request, or other type of issue.
Individual tracker entries are referred to as tracker artifacts, or just
artifacts.
-
Answer the questions posed by the required fields.
Note: Different trackers will have different combinations of fields to fill out, depending on what the tracker administrator has set up.
-
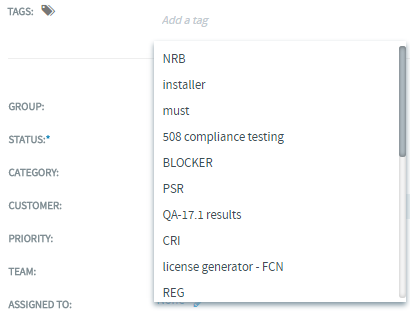
Now project members with CREATE/EDIT permissions can also
create new tags or add existing tags, if required from
Create Artifact page. Tags
creation from Create Artifact page
enables you to create tags on the go and overrides the
limitation of creating tags only from the Tags
page. However, you cannot rename or delete a
tag from Create Artifact page. Click
the
 button next to
Tags field to get the list of
tags mapped to your project. You can add up to a maximum
of 10 tags to any artifact and a message is displayed if
you try to add more than 10 tags. If the entered tag name
is not available already, a context menu Create
a new tag shows up for you to create a
new tag with the desired tag name.
button next to
Tags field to get the list of
tags mapped to your project. You can add up to a maximum
of 10 tags to any artifact and a message is displayed if
you try to add more than 10 tags. If the entered tag name
is not available already, a context menu Create
a new tag shows up for you to create a
new tag with the desired tag name.
 Note: Wherever the tag widget is not applicable, the associated tags are displayed as read only tags. For example in View Artifact page.
 -
If you want to assign it to a specific project member,
choose a name from the Assigned To
list. This lists displays the names of all the project
members, irrespective of the team you may have selected in
the previous step.
Note: From 17.8 release, TeamForge is configured to send HTML emails to users assigned to and users monitoring the artifact you create or update. For more details, see HTML emails.Note: If your project administrator has configured the tracker to automatically assign artifacts to project members, you can skip this step.
Reassigning artifacts can now be done in no time. Use the links under the "Assigned To" field to quickly unassign the artifact to "None", reassign the artifact to yourself or to the previous assignee. You can also click the "Re-assign" icon to search and reassign the artifact to any other user.


-
Now project members with CREATE/EDIT permissions can also
create new tags or add existing tags, if required from
Create Artifact page. Tags
creation from Create Artifact page
enables you to create tags on the go and overrides the
limitation of creating tags only from the Tags
page. However, you cannot rename or delete a
tag from Create Artifact page. Click
the