To configure the connector, specify system details and user credentials in the Landscape editor’s CCF, TeamForge Properties and ScrumWorks Properties tabs.
- In the CCF Properties screen:
-
Click Test Connection to test the connection to the central CCF database.
Note: If the database is local, you will not need to change the default settings. If CCF is installed on a different server, you need to specify the remote host name and then test the connection settings.
- Edit the CCF hosts section only if you use JMX monitoring. For JMX monitoring, replace http://localhost in the CCF-specific settings with the qualified hostname of the CCF server.
- If you need additional information about quarantined artifacts in the log messages, edit the defaults template by adding hospital table columns.
-
Click Test Connection to test the connection to the central CCF database.
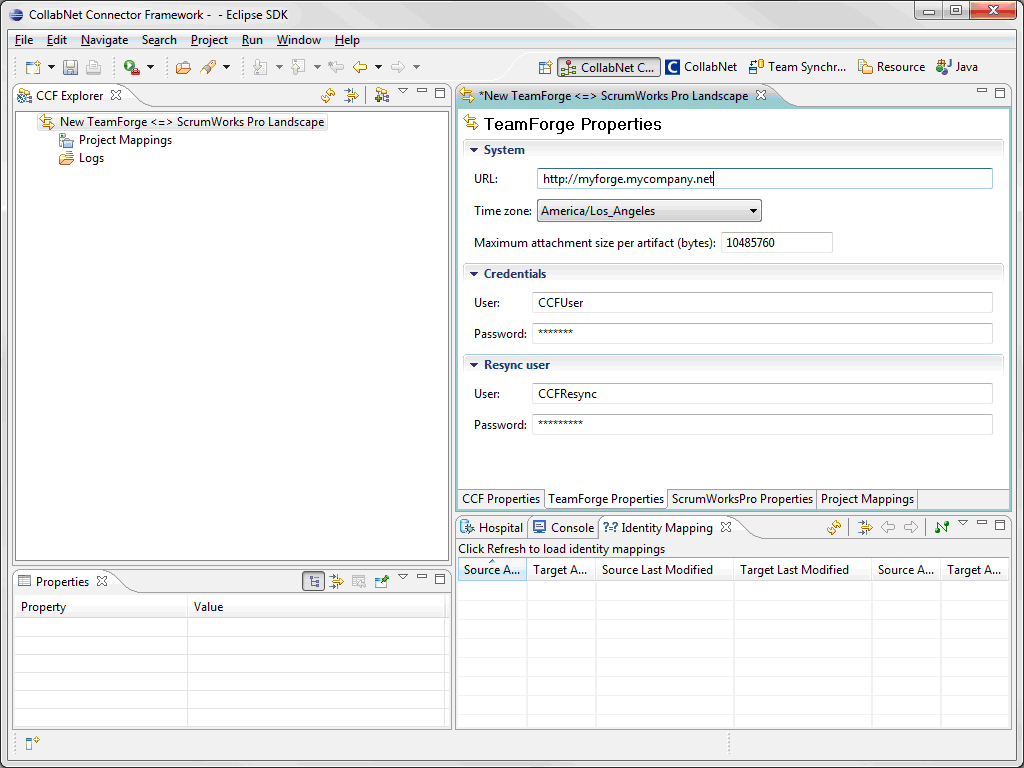
- In the TeamForge Properties screen:
- Enter the URL of the TeamForge site. For example, http://myforge.mycompany.net.
- Specify the timezone and maximum size for attachments.
- Specify the connector username and password.
Note: This refers to the dedicated connector user in TeamForge, who has the requisite permissions to access (read/write) the tracker involved in the mapping. It is important that no other user be allowed to log into the system with the connector user's username and modify this tracker's artifacts.
-
Note: If you're using CCF 1.5.1 or a later version, skip this step. You need to set up the Resync user account only for earlier versions of CCF.To use the resynchronization feature of the CCF, supply the Resync user's credentials.Note: This account is different from the ordinary connector user account. This user account is the dedicated Resync user.
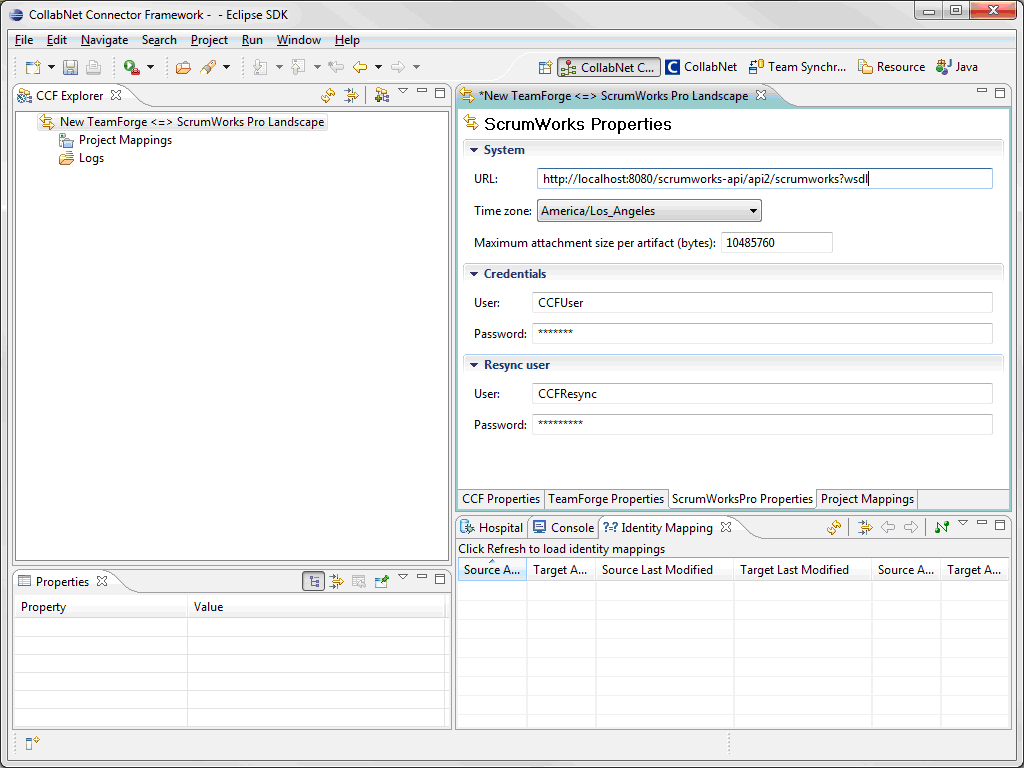
- Set up similar details for ScrumWorks Pro in the ScrumWorks Pro Properties screen.
- Enter the URL of the ScrumWorks Pro WSDL. For example, http://localhost:8080/scrumworks-api/api2/scrumworks?wsdl or https://yourcompany.collab.net/scrumworks-api/api2/scrumworks?wsdl
- Specify the timezone and maximum size for attachments.
- Specify the ScrumWorks Pro username and password.
Note: In order to avoid permissions conflicts in accessing ScrumWorks Products via the TeamForge connector, the user specified here should have Global Administrator privileges in ScrumWorks Pro. This user account is the dedicated connector user for ScrumWorks. It is important that no other user be allowed to login into the system with this connector user's username and modify data.
-
Supply the Resync user's credentials.
Note: This account is different from the ordinary connector user account. This user account is the dedicated Resync user.
- Save the properties changes.