In the planning board, you can assign artifacts to planning folders or rank them using drag and drop, make quick changes and in-place updates, and view charts that help you monitor progress.
-
To bring up the planning board for a project or planning folder, select from the context menu, and choose a planning board
configuration.
Here's an example of what you'll see:
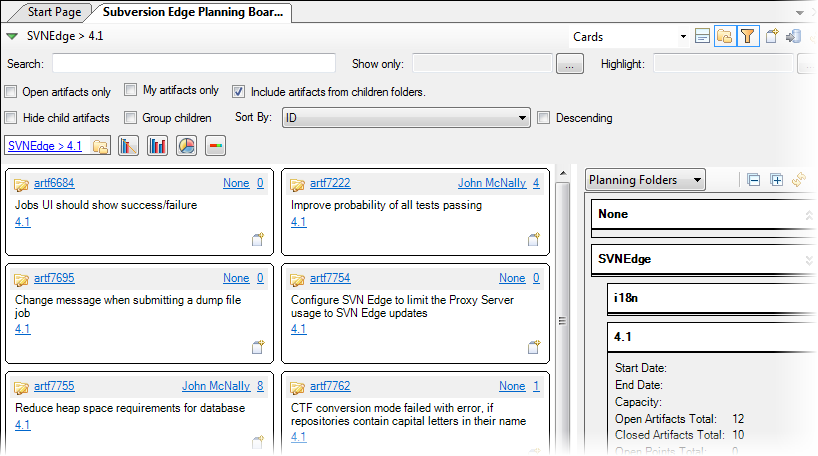
- Cards
- List
- Columns
- Planning folder:
- Depending on your active planning folder, you can see the list of
artifacts for the product (the "product backlog"), or a particular
release or iteration (in Agile terms, an "iteration backlog" or "sprint
backlog"). Select "None" to display all the artifacts required for
the product that have not yet been assigned to a specific iteration or
release.
When you open the planning board, the planning folder is set to the one you last worked with. Typically, this is the current sprint. When your change your active planning folder, the planning board will change to reflect your selection.
- Show only:
- Select an existing tracker query or add a new one to identify the artifacts you want displayed in the card area.
- Highlight:
- Select an existing tracker query or add a new one to highlight specific cards. For example, if you have all open artifacts displayed, you might want to highlight only the ones with the priority P1.
- Rank:
- Select Rank from the Sort By dropdown list to see artifact cards displayed in ranked sequence. To change the order in which artifacts are addressed, drag and drop the cards to change their ranks.
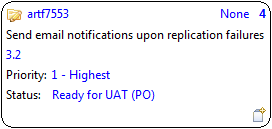
- Cards:
- Select this option from the planning board view dropdown list to see the
artifacts displayed as cards. In version 4.0 of the Desktop, this view
combines the functionality of the Summaries view available earlier. To
control the information displayed on the artifact cards, toggle the
Show card details option in the upper right
corner of the planning board. You can choose to display just the fields
focused on the Agile process: title, description, assigned user, story
size and the planning folder the artifact belongs to. Or you can choose
to display all the configured artifact fields.
 Note: Only the fields selected by the project administrator while configuring the planning board are displayed.To create a new artifact, click the New Artifact icon on the artifact card and fill in its attributes in the New Artifact dialog. The new artifact is assigned to the parent artifact's planning folder, not necessarily the folder currently selected.
 - List:
- Select this option from the planning board view dropdown list to have
the artifacts listed in a table instead of cards. You might find this
useful when you want to make quick inline edits to artifacts, for
example, when you're in a planning meeting and need to make changes on
the fly.
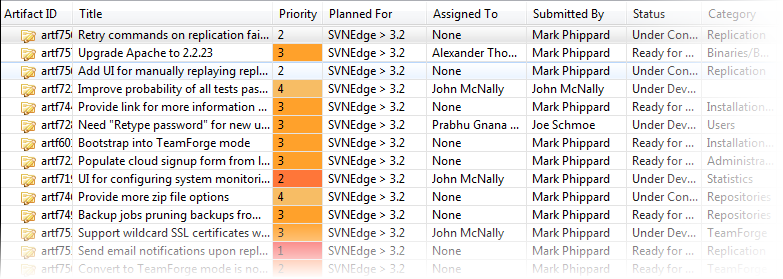 Tip: While the Sort By and Descending options are available for sorting artifacts in all planning board views, clicking a column header in the List view provides the same functionality.
When the planning board is in rank mode, you can use the Cut and Paste options from an artifact's context menu to change its rank. When not in ranked mode, you can use these options to change artifact dependencies.
Note: Inline edits are not saved to the server until you save your planning board changes. - Columns:
- Select this option from the planning board view dropdown list when you
want a view similar to the Board View in the TeamForge web
interface. This view is available with version 4.0 of the
Desktop. You start populating the columns by selecting a planning folder
for each. For example, you may want to select the product backlog in the
leftmost column and various teams working on the release in the other
two columns, or a different sprint in each column.
- To rank a card within a planing folder, drag and drop it within that column.
- To reassign a card from one planning folder to another, move it
across the columns. Note: When you drop the card, its rank is relative to its position in the new planning folder. If you move a child artifact to a planning folder where its parent is already present, the child artifact is filed under its parent and its rank is relative to the parent's position.
- Show planning folders:
- This option is selected by default and puts the planning board in planning mode.
The bulk of the planning board is taken up by the card area.
-
In the planning mode, consider the card area as a folder that represents your
backlog items. While planning your sprint, you drag and drop items from here to
the planning folders in the planning folder area.
Tip:
- Include artifacts from child folders:
- Select this option to see artifacts that are assigned to child
planning folders of the selected planning folder.
For an example of how this feature can be useful, let's say you have a planning folder Release 1.0 with child planning folders Iteration 1 and Iteration 2. You initially assigned some artifacts to Release 1.0 and are now ready to review those artifacts and decide which ones will be part of Release 1.0 > Iteration 1. In this case, you could select Release 1.0 as the active planning folder, without selecting the option to include artifacts from child folders. You then see only Release 1.0 artifacts that have not yet been assigned to an iteration. You can drag the cards intended for Iteration 1 from the card area and drop them in the Iteration 1 planning folder in the planning area. Because the option to include artifacts from child folders is not selected for Release 1.0, the card area no longer shows those artifacts that you just assigned to Release 1.0 > Iteration 1. If you are next planning for Iteration 2, you can drag and drop any of the remaining cards into the corresponding planning folder.
- Besides planning folders, the dropdown list in the planning folder area offers options for assignees and priorities. Depending on the selected option, you can drag and drop a card to change the user assigned to it, or its priority.
-
To update an artifact card, you can use any of several options:
- For the CollabNet Desktop artifact editor, click the Artifact ID, or right-click the card and select .
- The specialized card editor focuses on core artifact fields so that they can be edited quickly and easily. To use the specialized card editor, double-click the card, or right-click the card and select .
Note: Changes made using the specialized card editor are not saved to the server until you save your planning board changes.
When you select Planning Folders from the dropdown list, the planning folder area displays a hierarchy of all the planning folders in your project. There are several features to help you organize and work with planning folders:
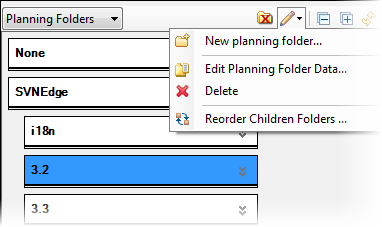
- Expand planning folders to see field details.
-
Edit planning folder
data.
- Display planning folders as a list.
- Show or hide inactive planning folders.
- Reorganize the sub-folders within a planning folder.
- Create a new planning folder.