When you add a TeamForge site, you can access its projects and tools in the Site Explorer, and work with tracker artifacts and planning folders using the Desktop editors.
-
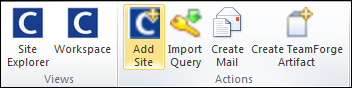
In the CollabNet tab, click the Add Site icon.
-
Select CollabNet TeamForge for the
site type and click Next.
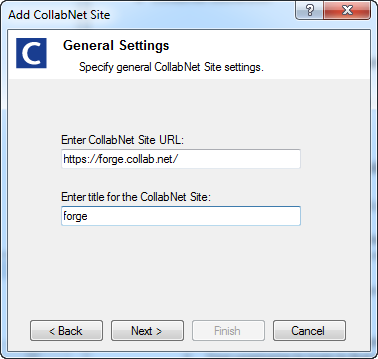
The General Settings dialog appears.
-
Specify a title and the URL for the site and click Next.
For example, https://forge.collab.net/.
The CollabNet TeamForge Site Settings dialog appears.
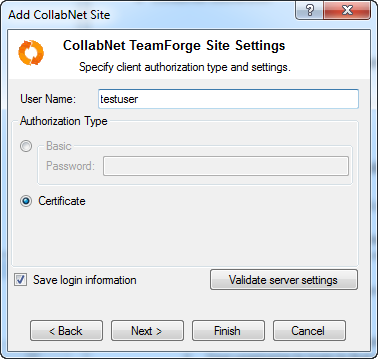
- Provide your username.
-
Specify the kind of client authorization required to connect to the TeamForge
server.
- If you are not using a client certificate, select Basic and enter your password for the site.
- Otherwise, select Certificate.
Microsoft's standard certificate selection dialog appears. It uses the standard certificate store (your personal store). Make sure that the client certificate is installed and available in the store.Tip: You can also verify this by connecting to the TeamForge server successfully using Internet Explorer.
- Select whether you want to save your credentials, and click Next.
-
Customize what you'd like to see in the view by specifying the
projects to be displayed.
- All projects on the TeamForge site.
- Only the projects in which you are a member.
- The projects you work with most frequently -- which you've designated as your favorites.
- Select a timezone for the CollabNet TeamForge server.
- Click Finish.
Your TeamForge site appears in the Site
Explorer. You can expand it to see the projects, and project application
folders for which you have view permission.