When you add a new cloud, you set up templates specifying details such as the host type and profile for the nodes that will be provisioned from this cloud.
-
In the Cloud section of the Hudson or Jenkins configuration page, click Add a
new cloud and select CollabNet Lab Management.
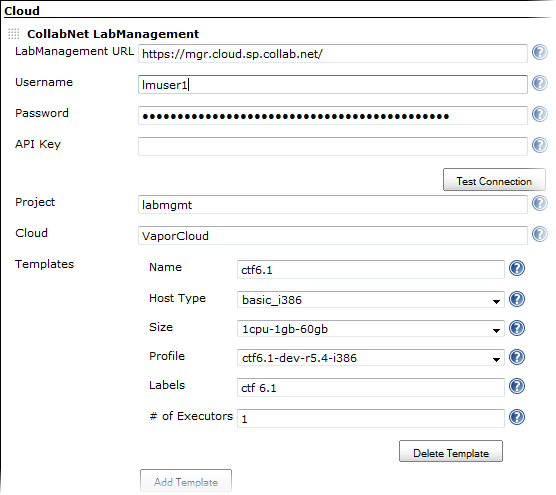
Lab Management options are displayed. Here's an example:
-
Enter the URL of the Lab Management Manager node. For example,
https://mgr.cloud.sp.collab.net/.
-
Provide the user name and password.
This user must have access to the Lab Management project where new hosts will be
allocated.
-
Enter the user's API key for the Lab Management web service.
Tip: Copy and paste the key from the user's Lab Management home page.
-
Click Test Connection to make sure that the options you provided are valid.
-
Specify the Lab Management project where new hosts will be added.
-
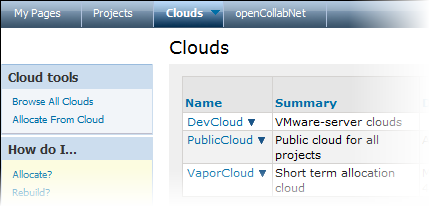
Select a Cloud from which new hosts will be allocated.
You can find the list of valid cloud names in the Lab Management Manager interface. For example:
-
Click Add Template to create a template that Hudson will start.
-
Specify a name that characterizes the template.
The name is used to identify the template and is displayed in various parts of the Hudson interface.
-
For Host Type, select the type of hardware you want for the node.
-
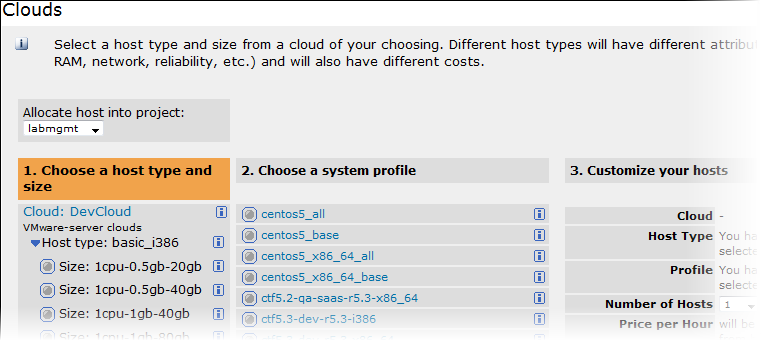
For Size, select the amount of resources -- memory, CPU, and disk -- assigned to this template.
You can find the exact amount of resources for each size in the Lab Management Manager's page. For example:
-
For Profile, select the Lab Management profile to be used for the template.
-
Provide a list of labels separated by white spaces.
Note: The names and labels you provide for the templates are used to specify which jobs will use this cloud.
-
Enter a value for # of Executors.
This controls the number of concurrent builds that Hudson or Jenkins can perform. So the value affects the overall system load that might be incurred. A good value to start with is the number of processors on your system.
When using Hudson or Jenkins in the master/slave mode, setting this value to 0 would prevent the master from doing any building on its own. Slaves may not have zero executors, but may be temporarily disabled using the button on the slave's status page.
-
Click Save.
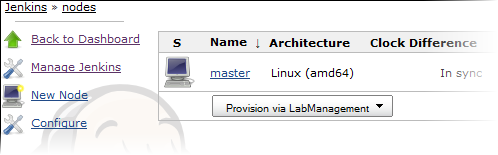
In the
Manage Nodes page, you'll see an option to provision a node from
Lab Management.