ActionHub, a component of CollabNet's DevOps solution, is the next generation
platform for integrating and automating software development tools used in the entire
software development life cycle. ActionFlow, another piece of CollabNet's DevOps solution,
works as the orchestrator on the DevOps solution. ActionFlow is integrated with TeamForge
and connected on ActionHub for the creation of different workflows. The workflows fire
actions that will do almost everything you need to automate your development
environment.
Before you begin, you must have TeamForge and EventQ 17.1 (or later)
installed and running. In this setup, it is assumed that you have TeamForge
Application (including the database and datamart) and EventQ (EventQ Application,
MongoDB, and RabbitMQ) running on two separate servers. See TeamForge installation requirements and EventQ installation requirements to know what it
takes to run TeamForge and EventQ. ActionHub is installed on the TeamForge
Application Server and ActionFlow is installed on a seprate
server.
Also see Port
Requirements.
Do this on the EventQ Server
-
Log on to the EventQ Server and download the ActionHub installer RPM:
CN-actionhub-17.1.0.11.rpm.
-
Install ActionHub.
Note: Before installing ActionHub, ensure that the EventQ services are up and
running.
- /etc/init.d/eventq status
- yum install
actionhub_installer
-
Run the enableActionHub utility. This is to create the
RabbitMQ account for ActionHub to use.
- /opt/collabnet/teamforge/bin/enableActionHub
Do this on the TeamForge Application Server
-
Log on to the TeamForge Application Server and download the ActionHub installer RPM:
CN-actionhub-17.1.0.11.rpm.
-
Install ActionHub.
-
Run the enableActionHub utility. This is to update the
site-options.conf file with the ActionHub services and
database information.
- /opt/collabnet/teamforge/bin/enableActionHub
-
Make sure the PUBLIC_FQDN site-options.conf token is set
as follows:
localhost:PUBLIC_FQDN = <IP address of TeamForge Application Server>
-
Stop TeamForge.
- /opt/collabnet/teamforge/bin/teamforge
stop
-
Deploy services.
- /opt/collabnet/teamforge/bin/teamforge
provision -y
Note: It will take a few minutes for TeamForge to start up.
-
Bootstrap ActionHub.
- /opt/collabnet/teamforge/bin/teamforge bootstrap -s
actionhub
-
Bootstrap ActionHub database.
- /opt/collabnet/teamforge/bin/teamforge bootstrap -s
actionhub-database
-
Start TeamForge.
- /opt/collabnet/teamforge/bin/teamforge
start
-
Open the site in your browser (https:\\hostname) and verify that TeamForge is
up and running.
Enter the TeamForge DevOps license key
-
Enter the DevOps license key. Select , click Enter License Key, paste the
TeamForge DevOps license key and click Save.
Note: Click Get License Key if you want to get the
TeamForge DevOps license key.
You can now assign the DevOps license to users.
-
Assign DevOps license to the TeamForge Administrator.
-
Select .
-
Select TeamForge Administrator.
-
Click Edit.
-
Select DevOps from the License
Type drop-down list.
-
Click Update.
This concludes setting up ActionHub with TeamForge. You can now add ActionHub to projects, create and integrate new workflow
systems and create new
rules to automate your processes.
Install
ActionFlow
and ActionDesigner: Do this on a separate
server
Requirements
- A workflow system created for ActionFlow in TeamForge. If not created
already, see Create Workflow Systems.
-
WorkFlow
Queue,
Action
Queue,
AMQP
User and AMQP Password
for
ActionFlow.
See Create Workflow Systems.
- Hardware/Software requirements for ActionFlow Server: RHEL/CentOS 7.x,
Quad-core CPU with 16GB RAM, 40GB storage (recommended EC2:
m4.xlarge).
- Downloaded
ActionFlow,
ActionDesigner
installer
and
CN-st2web
RPMs.
- Node.js v6.x (for ActionDesigner)
-
Log on to the TeamForge Application Server, copy the values of
WorkFlow Queue, Action Queue,
AMQP_User and AMQP_Password
for ActionFlow from the UI and keep them handy. For more information, see Create Workflow Systems.
-
Log on to the ActionFlow Server.
-
Install the ActionFlow RPM.
- yum install -y
CN-actionflowst2-17.1.0.xx.rpm
-
Update the ActionFlow site-options.conf file with
ActionFlow
username
and
password.
Note: You will be using
this
username
and
password
to log on to ActionFlow
post installation.
- vi
/opt/stackstorm/installer/site-options.conf
ACTIONFLOW_USER=<username>
ACTIONFLOW_PASSWORD=<password>
ST2_HOSTNAME=<The IP Address or fully qualified domain name of the ST2 host>
EVENTQ_HOST= <IP where TeamForge is hosted or  IP where eventq is hosted if EventQ is running on a separate server>
WORKFLOW_QUEUE=<ws.plug#### copied previously from TeamForge >
ACTION_QUEUE= <actions.plug#### copied previously from TeamForge>
AMQP_USER=<AMQP user  copied previously from TeamForge server>
AMQP_PASSWORD= <AMQP password copied previously from TeamForge server
-
Run the
ActionFlowSt2Install.sh
script.
- ./ActionFlowSt2Install.sh
Once the installation is complete, you will be prompted to press
Enter to restart the server.
-
Install the ActionDesigner RPM.
- yum install -y
CN-actiondesigner-17.1.0.xx.rpm
-
Edit the config.js file with the required information for
ActionDesigner to connect with ActionFlow.
- vi /opt/actiondesigner/config.js
"use strict";
var config = {
   "workflowHost": "<the URL for the ActionFlow instance>"
};
Object.defineProperty(exports, "__esModule", { value: true });
exports.default = config;
-
Start ActionDesigner.
- systemctl start actiondesigner
-
Run the CN-st2web RPM.
- rpm -ivh --force --nodeps --replacepkgs --replacefiles
CN-st2web-17.1.0.x.rpm
-
Configure
SSL for
ActionFlow, if
required.
For more information, see StackStorm Authentication.
-
In /etc/ssl/st2/ copy the
.crt file to be used as
st2.crt.
-
In /etc/ssl/st2/ copy the
.key file to be used as
st2.key.
-
Edit the /etc/st2/st2.conf file. Look for the
use_ssl setting, set it to True
and append the path to cert and key files as shown below.
use_ssl = True
cert = /etc/ssl/st2/st2.crt
key =/etc/ssl/st2/st2.key
-
Restart Stackstorm and Nginx services.
- st2ctl restart
- service nginx restart
-
Configure SSL for ActionDesigner, if required.
-
In /opt/actiondesigner/ssl/ copy the
.crt file to be used as
ca.crt.
-
In /opt/actiondesigner/ssl/ copy the
.crt file to be used as
server.crt.
-
In /opt/actiondesigner/ssl/ copy the
.key file to be used as
server.key.
-
Verify ActionFlow installation.
-
Add ActionFlow to TeamForge projects. See Add ActionHub/ActionFlow to TeamForge projects.
-
Create a test rule targetting ActionFlow and save the rule. See Create Rules.
- For example, create a test rule as follows:
- Rule Name: "TestActionFlow"
- Rule Source: "Work Item > Defects"
- Target: "ActionFlow"
- Criteria: leave defaults
- Action: "helloworld"
- Parameters: blank
- Save the rule.
- Go to Trackers > Defects and add a comment to a defect.
- Select ActionHub from the tools menu, go to Rule
Execution History tab and verify that the
test rule has been executed.
- Select ActionFlow from the tools menu and log on to
ActionFlow.
- In the History tab, you should see two
processes: "actionhub.msg_handler" and
"collabnet-generic-flows.helloworld". Watch for the status
circle in front of these processes to turn green indicating
that the processes ran successfully.
-
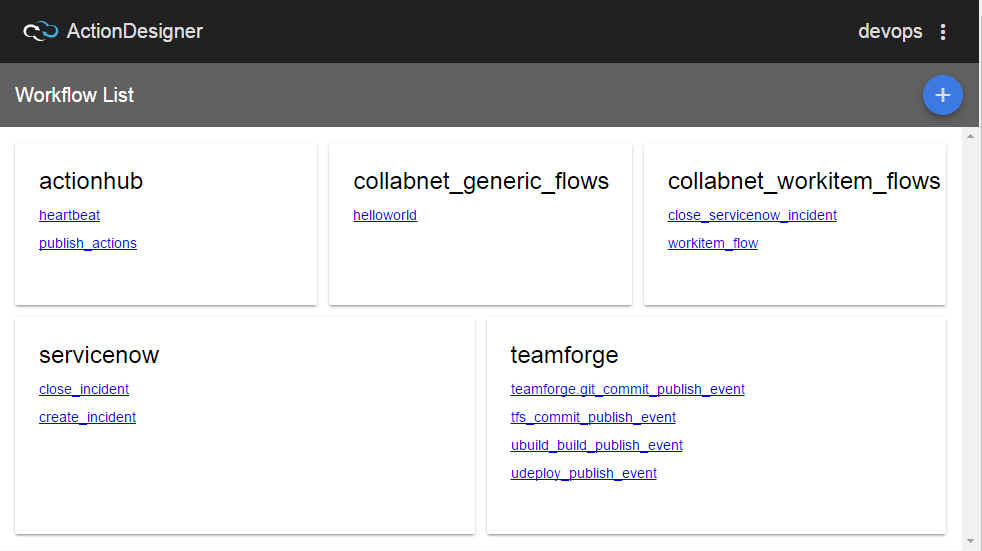
Verify ActionDesigner installation.
-
Open the following URL in a browser:
https://<host>:8001/actiondesigner (for example,
https://forge-actionflow.collab.net:8001/actiondesigner) and log on to
ActionDesigner using your ActionFlow credentials.
This concludes setting up ActionFlow with TeamForge. You can now add ActionFlow to
projects, and create new rules to automate your processes.