TeamForge 16.7 supports an integration with TestLink 1.9.15 and later to track and synchronize requirement and defect tracker artifacts between these two systems.
CollabNet supports only the integration between TestLink and TeamForge. For TestLink support, contact TestLink directly. Click here for more information.
TeamForge 16.7 and later releases support integration only with TestLink 1.9.15 and later. If you are on earlier versions of TestLink, upgrade to TestLink 1.9.15 and later and integrate it with TeamForge. This integration does not provide backward compatibility (Data reliability and Migration) to older TeamForge-TestLink 1.9.11 integration that is based on TeamForge's Integrated Application Framework (IAF).
What's new
TeamForge 16.7 (and later) brings a new TeamForge-TestLink integration. This integration is based on TestLink’s new API and plugin infrastructure, making it easy to upgrade TestLink independently. TestLink test case runs now participate in TeamForge associations and traceability (see below). Single Sign On (SSO) support and automated defect creation have been dropped in this release. The latter has been replaced with a “push button” defect creation giving testers more flexibility while eliminating issues with TeamForge Tracker workflow requirements.
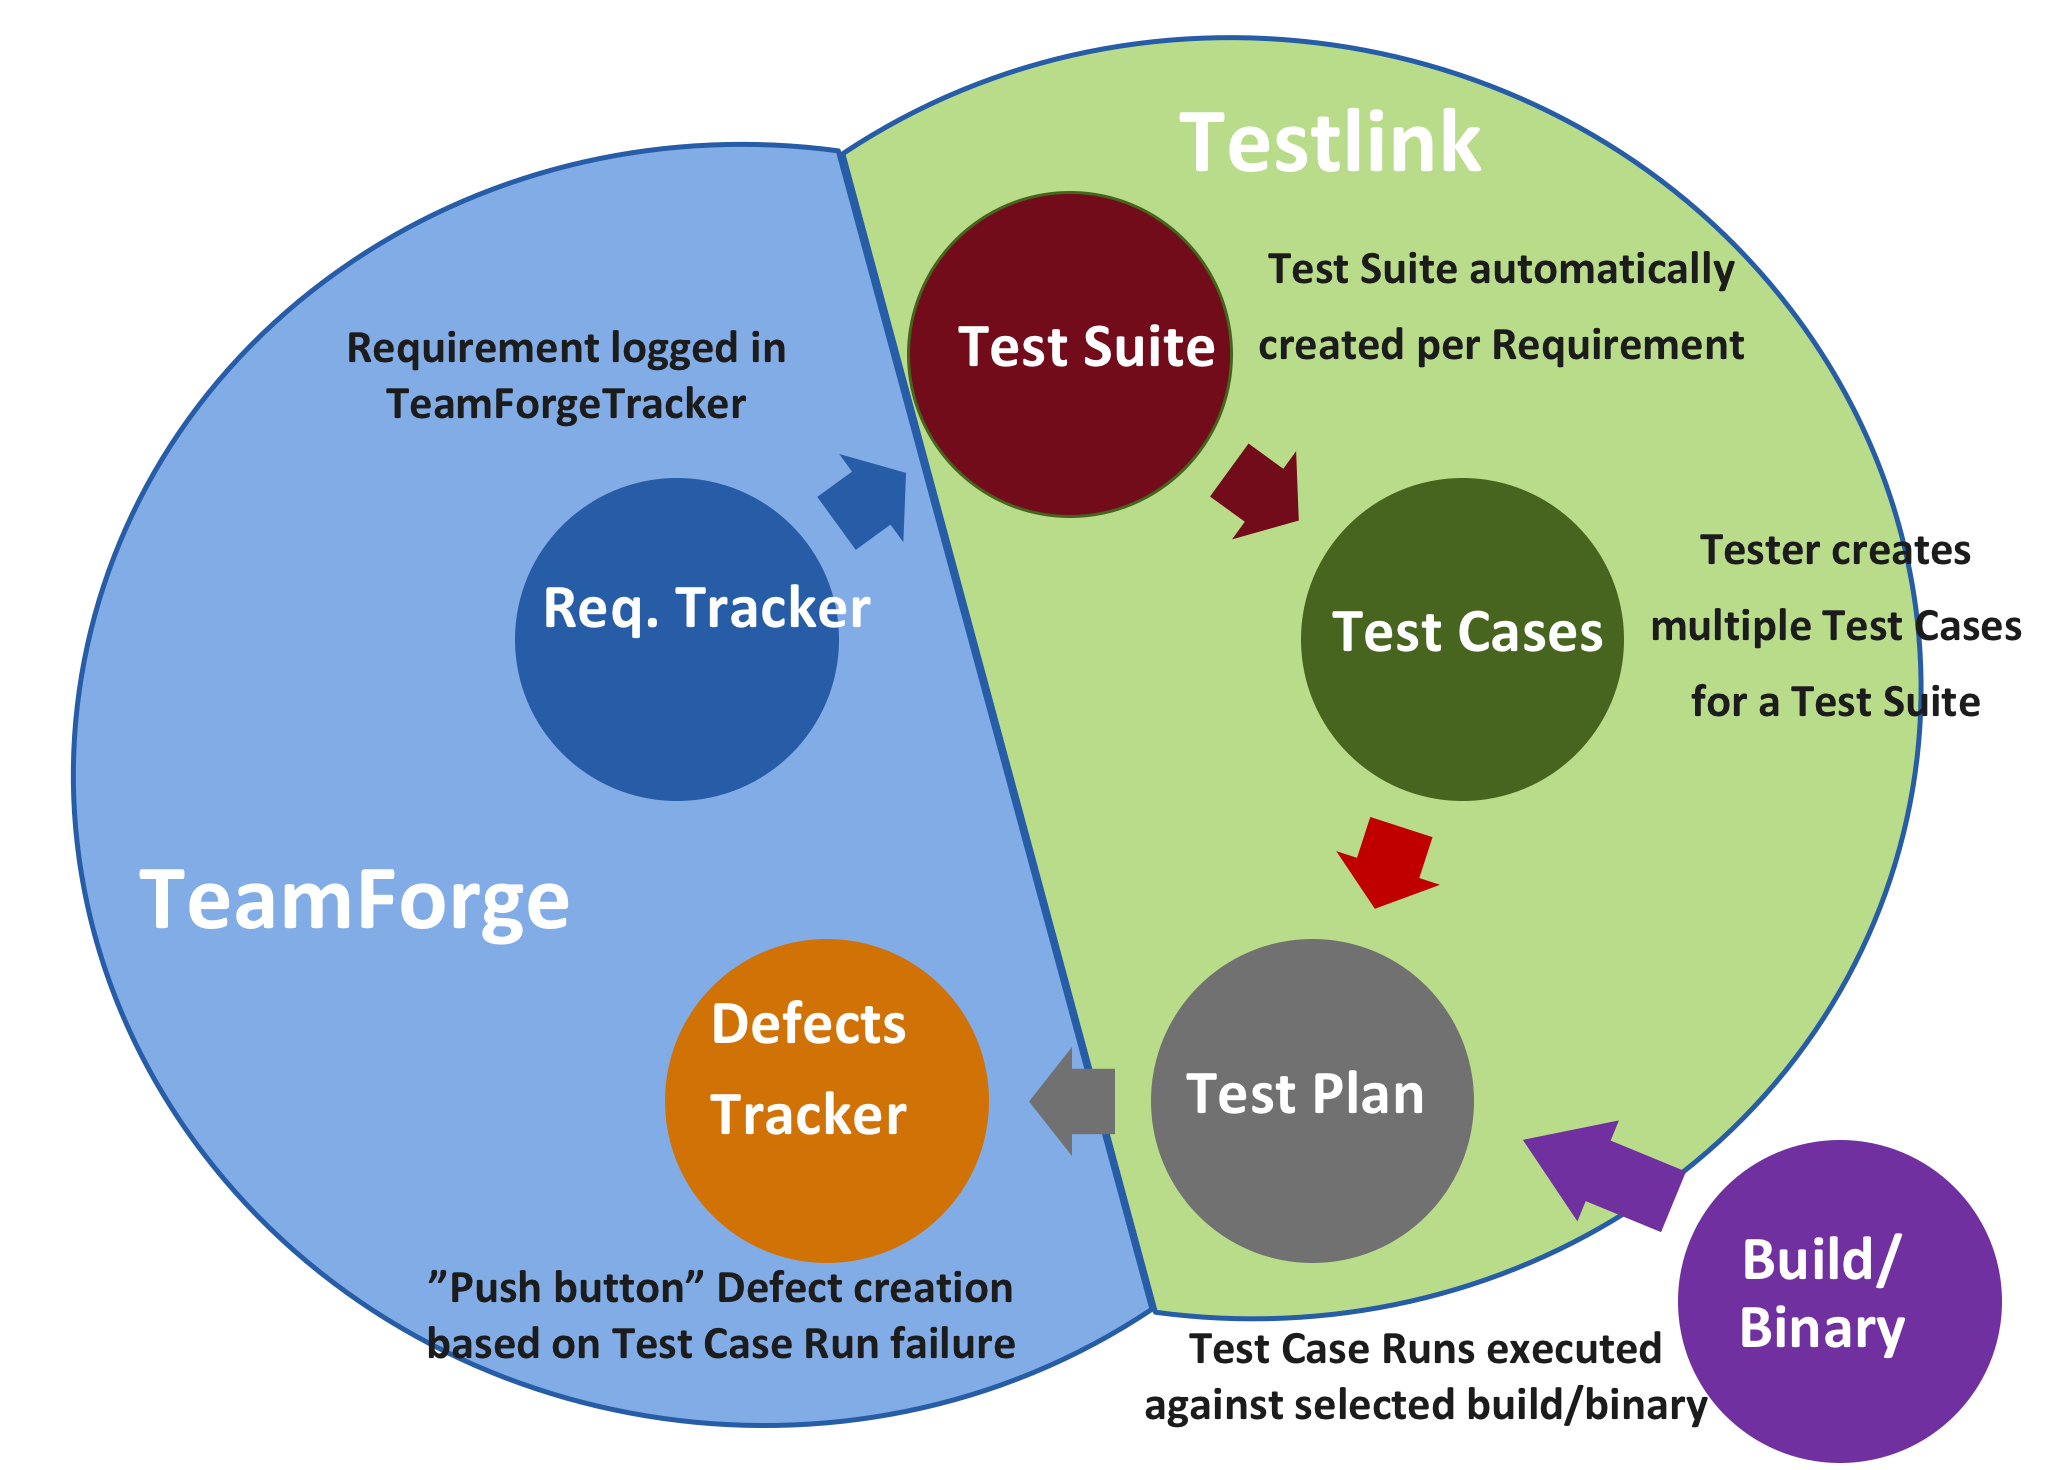
- Requirements (TeamForge) to Test Suites (TestLink)
- Test Case Run failures (TestLink) to Defects (TeamForge)
- Step 1: Map TeamForge and TestLink project
- The first step is to establish a project mapping between the intended TeamForge and TestLink projects. During mapping, in TestLink you’ll be able to specify the TeamForge “Requirements” and “Defects” trackers for your project. These trackers will be used throughout the workflow.
- Step 2: Create Requirements and Test Suites
- When a requirement artifact is created in the TeamForge tracker specified in 1
above, you will be given the opportunity to create a matching “Test Suite” in TestLink straight from the artifact creation screen
in TeamForge.
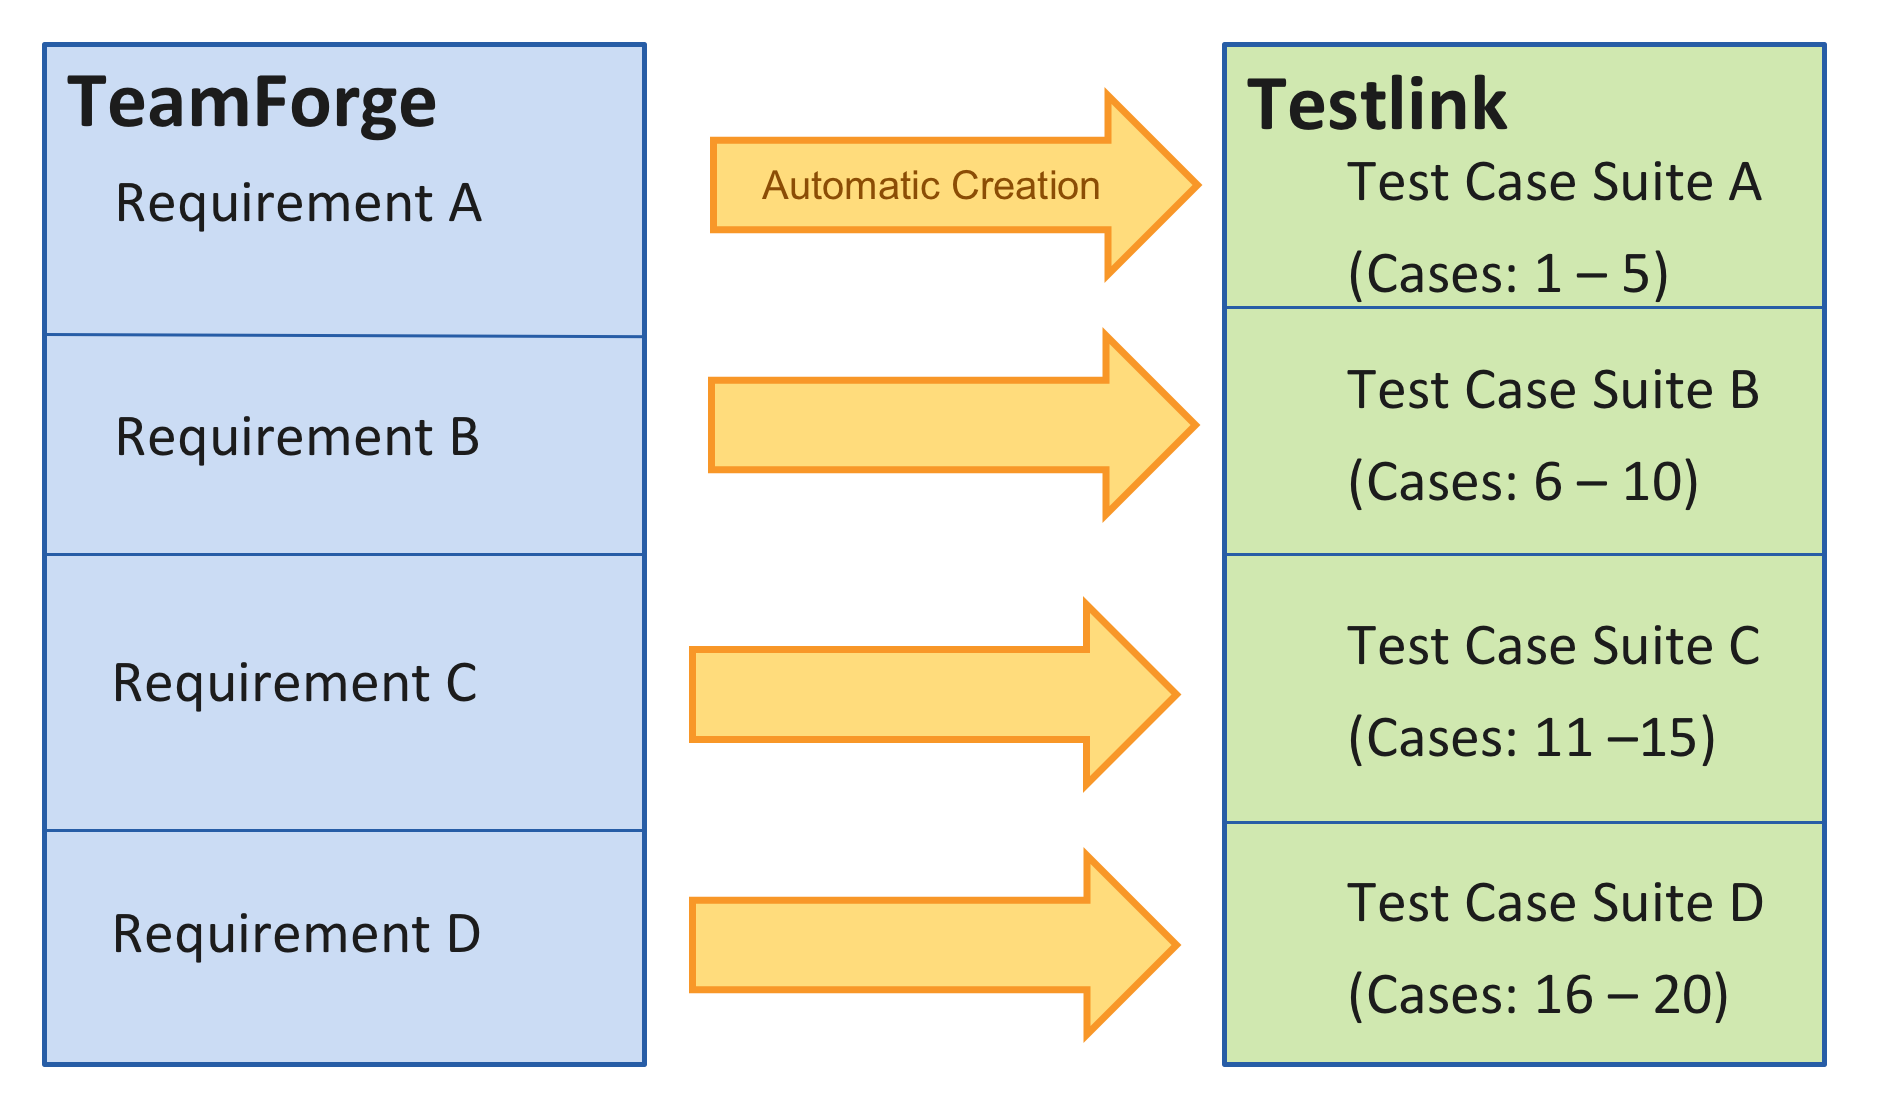
- Step 3: Populate Test Suite with Test Cases
- Within TestLink you can find and populate your Test Suite with Test Cases.
- Step 4: Run Test Cases against Builds
- Once the Test Cases have been defined, you can run them against desired builds, tracking results in TestLink. Test Case runs are associated to the build/binary being tested for traceability purposes.
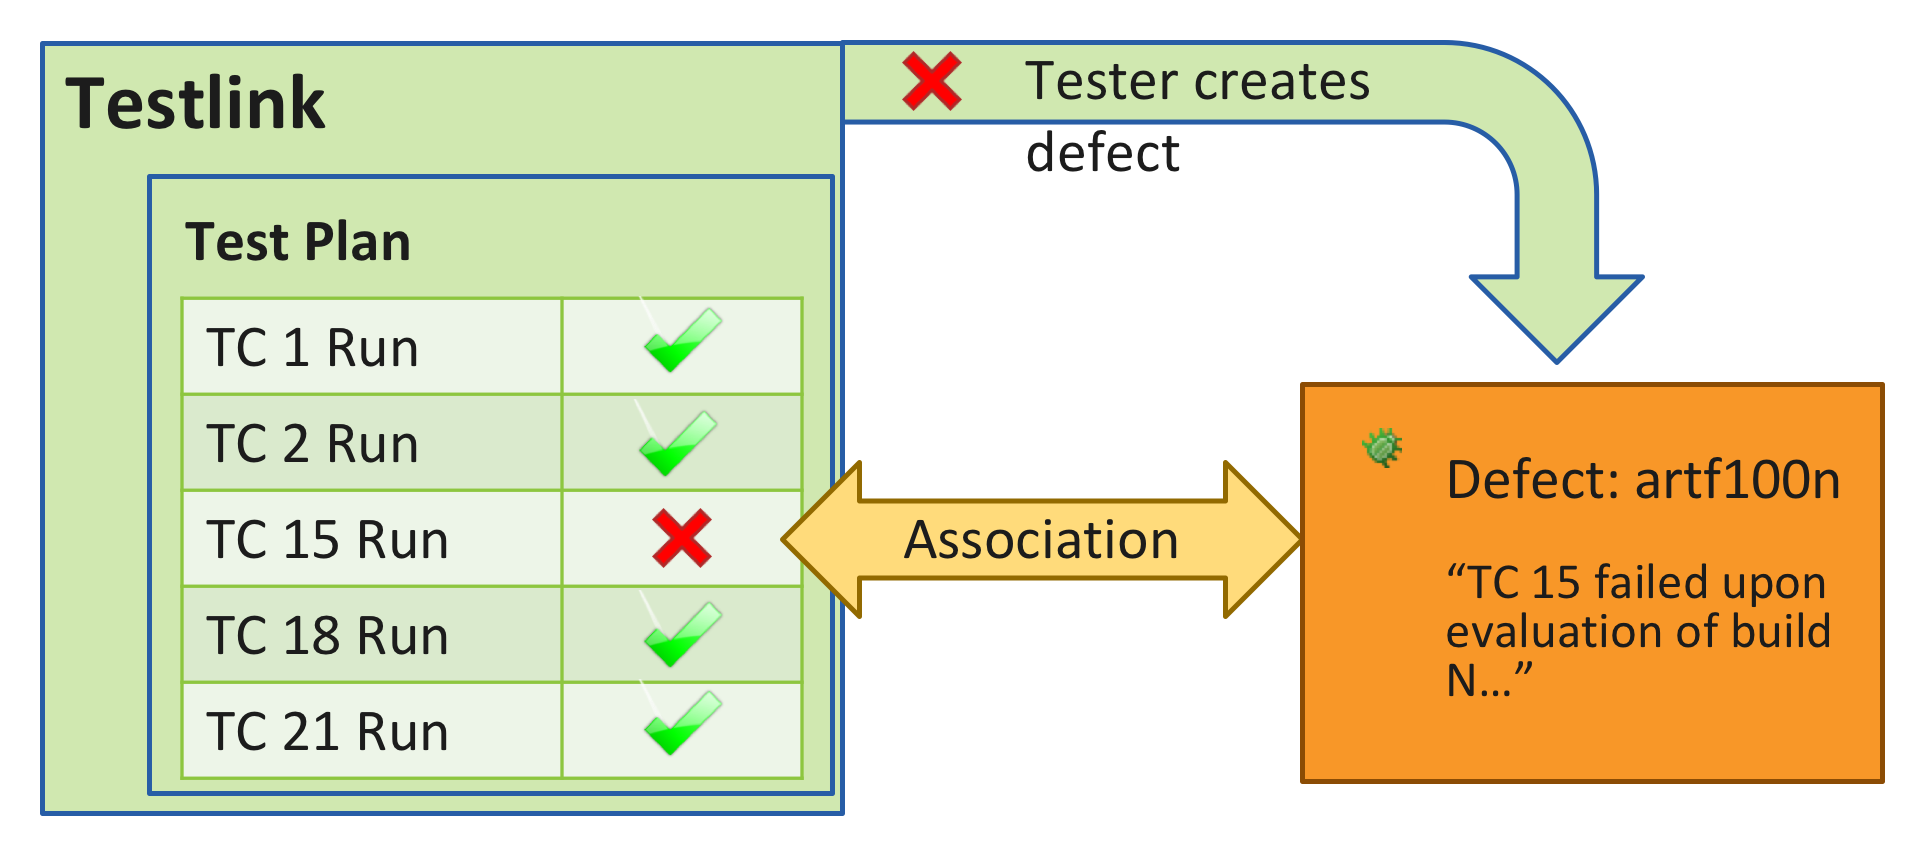
- Step 5: Create Defects for failed Test Case runs
- If you encounter failing Test Case runs, you have the option to click a button
inside TestLink to create a defect in
TeamForge. This is a “push button” defect that opens a new TeamForge window
pre-populated with Test Case run failure data. An association will be created between
the failing Test Case run and the new Defect.
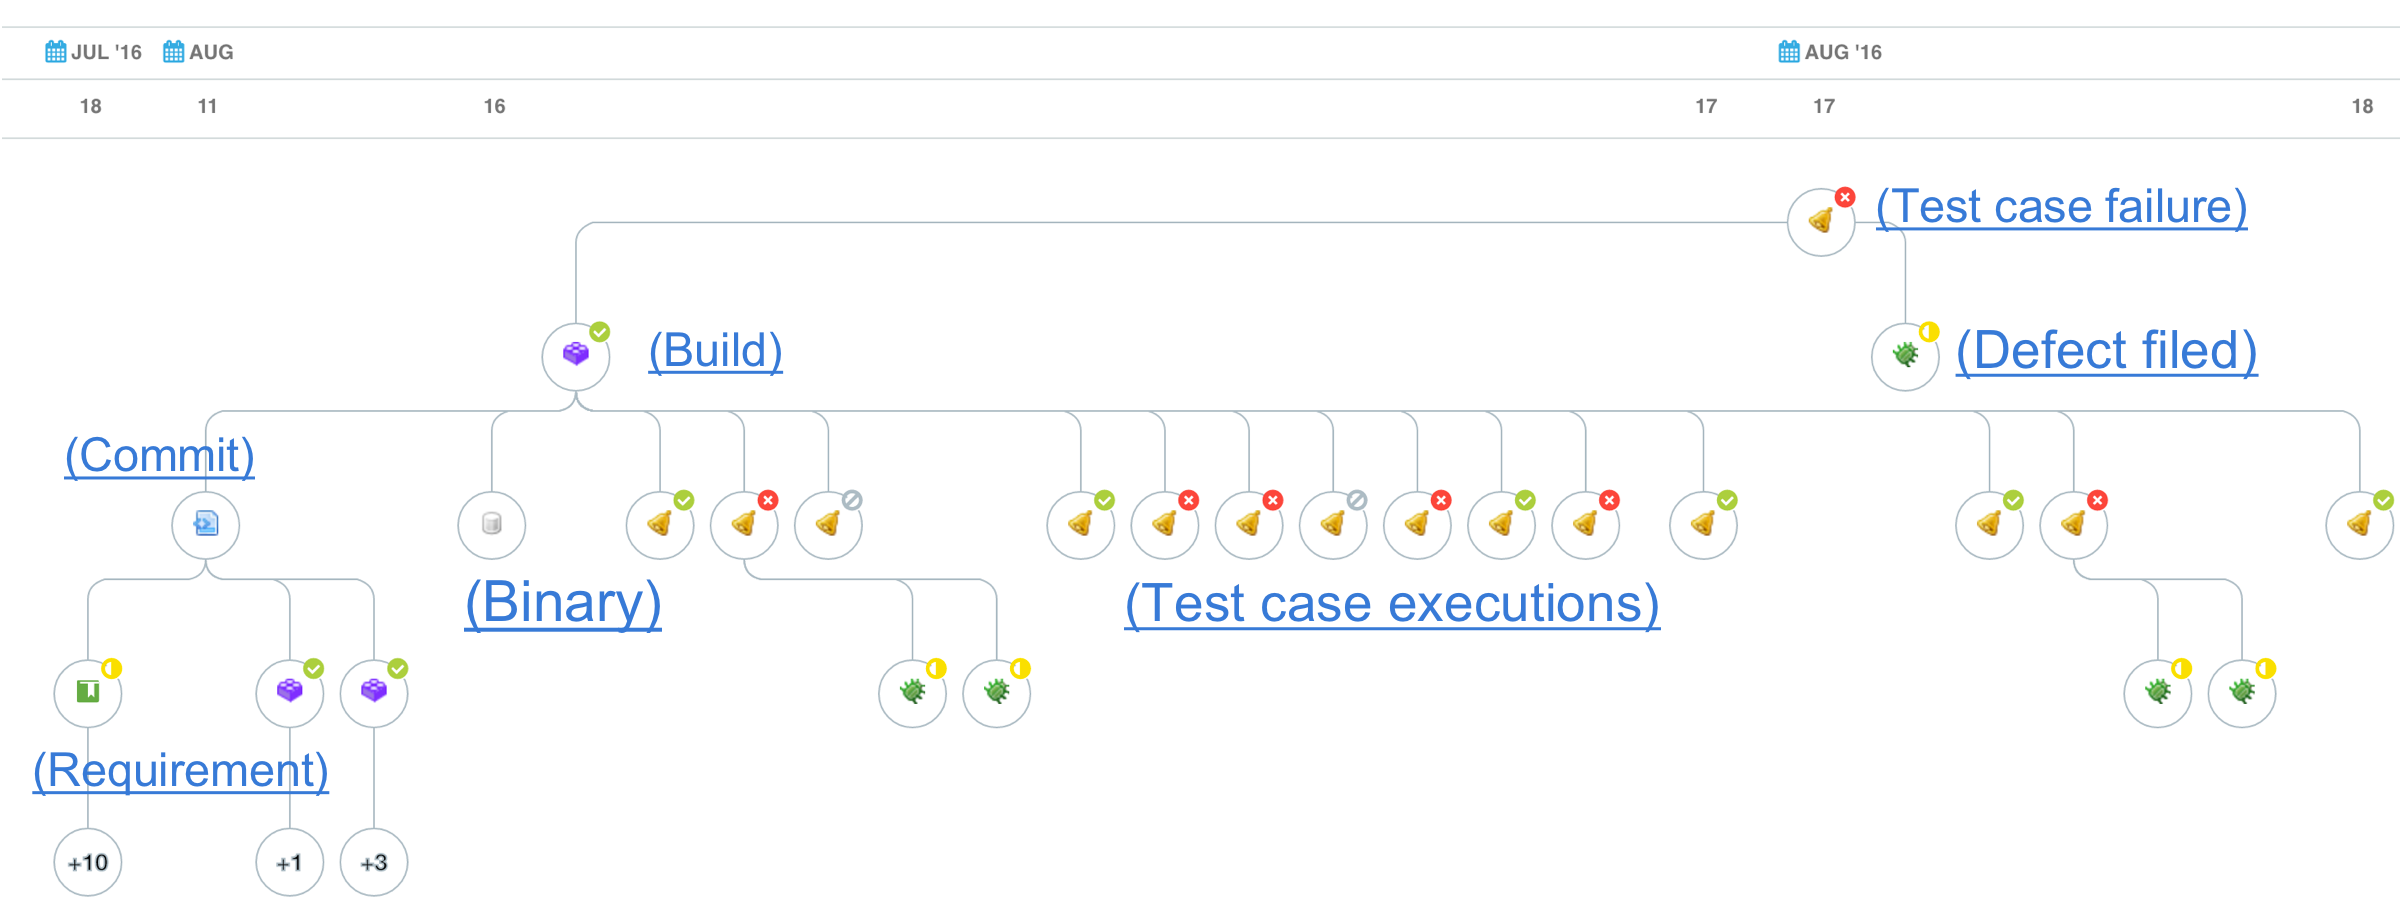
- Step 6: Visualize Traceability
- Once this cycle is complete, you can view the associations chain between Test Case
runs and any associated defects, the Builds or Binaries they exercised, the Commits
which originated the Build, and ultimately the Requirements that started it all.