Configure "TeamForge Associations" to notify TeamForge EventQ about work item activities.
-
Configure the add-on from the Project Administration
page to notify TeamForge-EventQ about the work item activities.
-
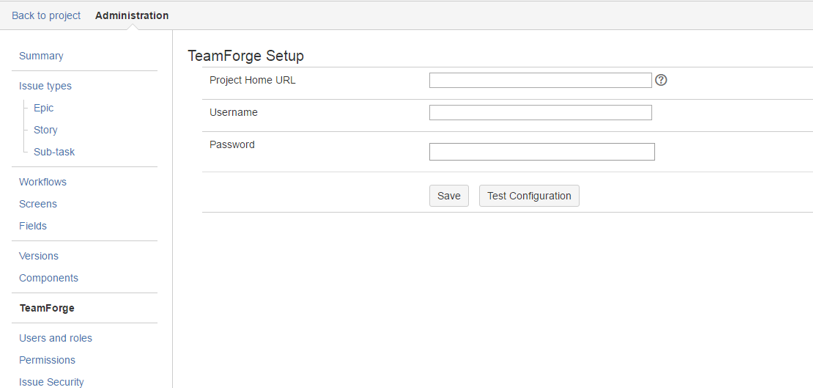
Navigate to Administration > TeamForge.
The TeamForge Setup page appears.
-
Find the TeamForge project to associate with and enter its url in the
Project Home URL field.
Obtain the TeamForge Project Home URL by navigating to the target TeamForge project and clicking Project Home. Copy the URL from the browser.
-
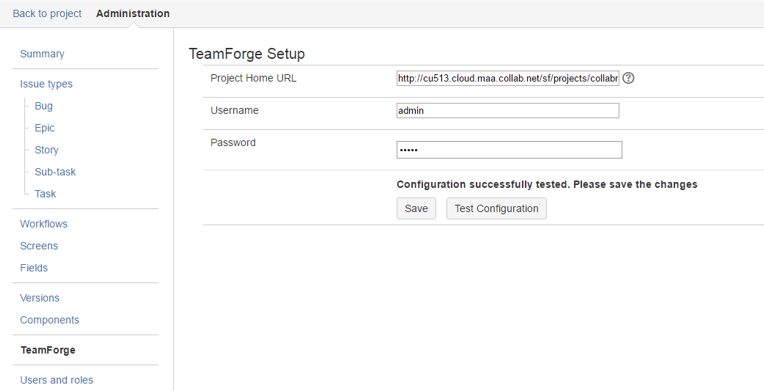
Using your valid TeamForge login credentials, click Test
Configuration.
The user whose credentials are supplied must have API permissions in both TeamForge and EventQ, or is a Project Admin.
-
Click Save to save the configuration.
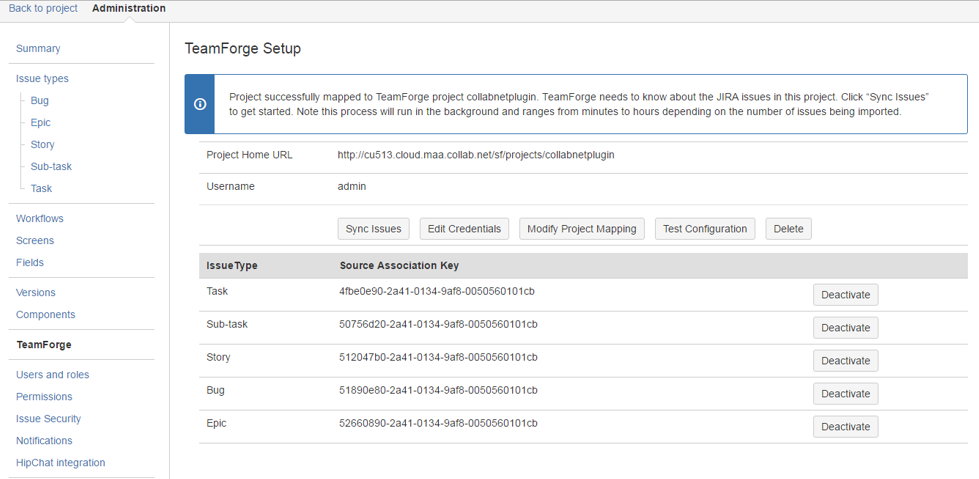
When you save your configuration, for each issue type in the
JIRA project a corresponding source is created in the TeamForge EventQ.
-
Navigate to Administration > TeamForge.
Sync Existing JIRA issues into TeamForge
-
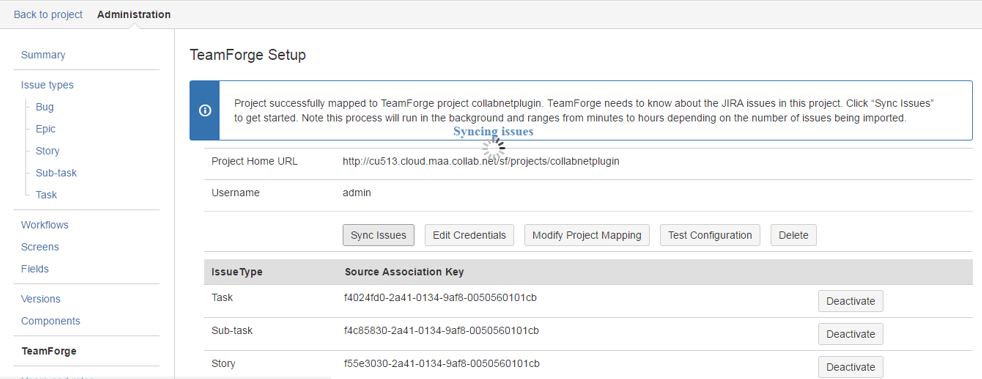
To associate TeamForge objects to existing JIRA issues, click Sync
Issues.
This step bootstraps JIRA issue data from the current project into the TeamForge EventQ data store. Note that this process may take several minutes (even hours) to complete, depending on the number of issues in the JIRA project.
Test or modify configuration
-
Test the current configuration by clicking Test
Configuration.
The system indicates whether the supplied URL and credentials work properly.
-
To modify the supplied credentials, click Edit
Credentials.
- Modify either the Username or Password fields.
- Click Test Configuration to verify your settings.
- Click Save once testing is satisfactory.
-
To modify the TeamForge project mapping, click Modify Project
Mapping.
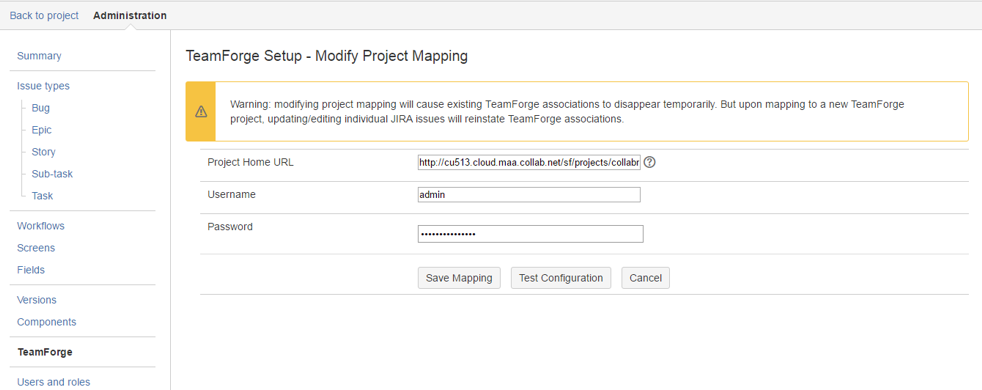
- Modify the ProjectHome URL field to reflect the desired TeamForge project.
- If required, update the credentials to match the TeamForge project.
- Click Test Configuration to verify that the supplied user has adequate permissions in the selected TeamForge project.
- Click Save Mapping once testing is satisfactory.
Note: Upon successfully re-mapping the JIRA project, Run Sync Issues again to populate the TeamForge data store.
Delete Project Mapping Configuration
-
Click Delete if you wish to completely disassociate the
JIRA project from the configured TeamForge project.
Warning: Note that doing so will abandon all existing association data. The JIRA project can be mapped to another project subsequently, but existing associations will be lost. Do this if you were testing the integration using a production JIRA project but now wish to remove any test association data.