In this procedure, we'll assume that you are upgrading on the same server where your existing TeamForge 16.7 site is running.
- TeamForge Application Server
- Database Server (Operational DB and Reports DB)
- Black Duck Code Sight Server
- ETL Server
- Search Server (Indexer).
- SCM Integration Server (Subversion and CVS)
- Git Integration Server
- TeamForge EventQ Server (App, MongoDB and RabbitMQ)
Do the following on the TeamForge Application Server - server-01
- Before you upgrade to TeamForge 16.10, uninstall hotfixes and add-ons, if any.
-
If you have Review Board installed,
uninstall Review Board.
- cd /opt/collabnet/RBInstaller-1.9.3
- python ./install.py -u
-
Stop the TeamForge CLI
add-on
(This step is required only for TeamForge Application
server).
- service teamforge_cli_server stop
-
Stop TeamForge.
- /etc/init.d/collabnet stop all
- No backup is required for same hardware upgrades. However, you can create a backup as a precaution. See Back up and restore TeamForge and EventQ to learn more about backing up TeamForge and EventQ database and file system.
-
Upgrade the operating system packages.
- yum upgrade
-
If the TeamForge server has SELinux
enabled, run it in 'Permissive' mode temporarily while installing or upgrading
TeamForge.
Important: If you have SELinux in "enforcing" mode, you must either disable SELinux or switch to "Permissive" mode (recommended) before running the /opt/collabnet/teamforge/bin/teamforge provision command. TeamForge create runtime fails otherwise.
-
Verify if SELinux is running in enforcing mode.
- getenforce
-
If the output of the getenforce command is
"Permissive", continue with the next
step.
If not, run the following command to bring it to 'Permissive'
mode.
- setenforce 0
-
Verify if SELinux is running in enforcing mode.
-
Configure your TeamForge installation repository.
- TeamForge installation repository configuration for sites with internet access
- Contact the CollabNet Support and download the TeamForge 16.10 installation repository package to /tmp.
-
Install the repository package.
- yum install -y /tmp/collabnet-teamforge-repo-16.10-1.noarch.rpm
-
Refresh your repository cache.
- yum clean all
- TeamForge installation repository configuration for sites without internet access
-
Contact the CollabNet Support to get the auxiliary installer package for
TeamForge
16.10 disconnected installation and save it in
/tmp.
- Red Hat Enterprise Linux/CentOS 6.8 64 bit RPM package: CTF-Disconnected-media-16.10.658-76.rhel6.x86_64.rpm
-
Unpack the disconnected installation package.
- rpm -Uvh <package-name>
-
Note: If the Red Hat Enterprise Linux/CentOS installation DVD is mounted already, skip the following instructions. If not, mount the DVD.Mount the Red Hat Enterprise Linux/CentOS installation DVD. The DVD contains the necessary software and utilities required for installing TeamForge without internet access.
In the following commands, replace "cdrom" with the identifier for your server's CD/DVD drive, if necessary.
- cd /media/
- mkdir cdrom
- mount /dev/cdrom ./cdrom/
If there are any spaces in the automount, unmount it first and mount it as a filepath, with no spaces.
-
Create a yum configuration file that points to the Red Hat Enterprise Linux/CentOS installation DVD.
- vi /etc/yum.repos.d/cdrom.repo
[RHEL-CDROM]
name=RHEL CDRom
baseurl=file:///media/cdrom/Server/
gpgfile=file:///media/cdrom/RPM-GPG-KEY-redhat-release
enabled=1
gpgcheck=0
-
Verify your yum configuration files.
- yum list httpd
- yum list apr
-
Download the code search installation package,
CodeSearch-installer-2.1.3-1.noarch.rpm from
https://ctf.open.collab.net/sf/go/rel4193 and save it in the /tmp
directory. To install the Black Duck Code Sight installer, run the
following command.
- cd /tmp
- rpm -ivh CodeSearch-installer-2.1.3-1.noarch.rpm
-
Install the following application packages.
-
To install the TeamForge
application packages run the following command:
- yum install teamforge
Attention: TeamForge installer is being optimized quite a bit. It's likely that you might come across a lot of warning messages while upgrading from TeamForge 8.2 (or earlier) to TeamForge 16.10 on the same hardware (when you run the yum install teamforge command). You can safely ignore such warning messages and proceed with the upgrade. -
To install the CollabNet binary application, run the following
command.
- yum install cn-binary
-
Tip: If you have Black Duck Code Sight already, it is automatically upgraded when you run yum install teamforge. In such case, you can skip the following sub-step.To install the Black Duck Code Sight packages run the following command:
- yum install teamforge-codesearch
-
To install the TeamForge
application packages run the following command:
-
Set up your site's master configuration file.
-
Set up your site options. See Site options change log for a
list of new and obsolete tokens.
- vi /opt/collabnet/teamforge/etc/site-options.conf
- TeamForge 16.7 and later versions support automatic JAVA_HOME configuration. Remove the JAVA_HOME token, if present, from the site-options.conf file.
-
Update the host name and domain name, if required.
HOST_localhost=app database datamart etl indexer
HOST_my.scmandgit.domain.com=subversion cvs gerritDOMAIN_localhost=my.app.domain.comAdd 'codesearch' to the HOST_localhost token if you are installing Black Duck Code Sight.HOST_localhost=app database datamart etl indexer codesearch
Add 'binary' to the HOST_localhost token if you are installing Nexus.HOST_localhost=app database datamart etl indexer codesearch binary
Add 'reviewboard' to the HOST_localhost token if you are installing Review Board.HOST_localhost=app database datamart etl indexer codesearch binary reviewboard
-
Turn on the SSL for your site by editing the relevant variables in the
site-options.conf file. To generate the SSL
certificates, see Generate SSL certificates.
SSL=on
SSL_CERT_FILE
SSL_KEY_FILE
SSL_CHAIN_FILE
Note: The SSL_CERT_FILE and SSL_KEY_FILE tokens need an absolute path. The SSL_CHAIN_FILE token is optional. -
If the token REQUIRE_PASSWORD_SECURITY is enabled,
then set a value for the token,
PASSWORD_CONTROL_EFFECTIVE_DATE.
CAUTION:The Password Control Kit (PCK) disables, deletes or expires user accounts that don't meet the password security requirements starting from the date set for the PASSWORD_CONTROL_EFFECTIVE_DATE token. If a date is not set, the PCK disables, deletes or expires user accounts immediately. See PASSWORD_CONTROL_EFFECTIVE_DATE for more information.
- TeamForge 7.1 and later support automatic password creation. See AUTO_DATA for more information.
-
Password obfuscation: The password obfuscation is enabled by
default. As a result, all password-related tokens are encrypted in all
the TeamForge configuration
files.
Restriction: The password-related tokens cannot contain the following characters in the site-options.conf file: $<>/\'"`
- To disable password obfuscation, set OBFUSCATION_ENABLED=false.
- To configure the obfuscation key, set OBFUSCATION_KEY=<Any AlphaNumeric value with length >= 8 bytes>. The default value of OBFUSCATION_KEY token is XSJt43wN.
- Configure the Black Duck Code Sight tokens. See Black Duck Code Sight site-option tokens.
- To enable the history protection feature of TeamForge Git integration, set the GERRIT_FORCE_HISTORY_PROTECTION=true. For more information, see GERRIT_FORCE_HISTORY_PROTECTION.
- If you have LDAP set up for external authentication, you must set the “REQUIRE_USER_PASSWORD_CHANGE” site options token to false.
- Make sure the PostgreSQL tokens in the site-options.conf file are set as recommended in the following topic: What are the right PostgreSQL settings for my site?
- Enable the POSTGRES_INTERFACE token in the site-options.conf file if the value of "ifconfig -a" is not eth0/enp0*.
-
Configure the JBOSS_JAVA_OPTS site-options.conf
token. See JBOSS_JAVA_OPTS.
Important: All JVM parameters but -Xms1024m and -Xmx2048m have been hard-coded in the TeamForge core application. You need not manually configure any other parameter (such as -XX:MaxMetaspaceSize=512m -XX:ReservedCodeCacheSize=128M -server -XX:+HeapDumpOnOutOfMemoryError -Djsse.enableSNIExtension=false -Dsun.rmi.dgc.client.gcInterval=600000 -Dsun.rmi.dgc.server.gcInterval=600000) in the site-options.conf file.
When you change the default value of a JVM parameter such as "-XX:HeapDumpPath", the JBoss runtime parameters include both the user defined and default values for the JVM parameter. However, JBoss runs with the user defined value and ignores the default value.
- Configure TeamForge site options to proxy EventQ through TeamForge. For more information, see "EventQ and TeamForge on two separate servers" section in this topic: Proxying EventQ through TeamForge. Also see Proxy settings and ports used by TeamForge EventQ services.
- Save the site-options.conf file.
-
Set up your site options. See Site options change log for a
list of new and obsolete tokens.
-
Deploy
services.
- /opt/collabnet/teamforge/bin/teamforge provision
The "provision" command prompts for response before it bootstraps or migrates data during TeamForge installation and upgrade respectively. Enter "Yes" or "No" to proceed. For more information, see The teamforge script.
Do the following on the SCM and Git Integration Server - server-03
-
Stop TeamForge.
- /etc/init.d/collabnet stop all
- No backup is required for same hardware upgrades. However, you can create a backup as a precaution. See Back up and restore TeamForge and EventQ to learn more about backing up TeamForge and EventQ database and file system.
-
Upgrade the operating system packages.
- yum upgrade
-
If the TeamForge server has SELinux enabled,
disable it temporarily while installing or upgrading TeamForge.
TeamForge create runtime fails otherwise.
-
Verify if SELinux is running in enforcing mode.
- getenforce
- If the output of the getenforce command is either "Disabled" or "Permissive", SELinux is already disabled.
-
If not disabled, run the following command to disable SELinux.
- setenforce 0
-
Verify if SELinux is running in enforcing mode.
-
Configure your TeamForge installation repository.
- TeamForge installation repository configuration for sites with internet access
- Contact the CollabNet Support and download the TeamForge 16.10 installation repository package to /tmp.
-
Install the repository package.
- yum install -y /tmp/collabnet-teamforge-repo-16.10-1.noarch.rpm
-
Refresh your repository cache.
- yum clean all
- TeamForge installation repository configuration for sites without internet access
-
Contact the CollabNet Support to get the auxiliary installer package for
TeamForge
16.10 disconnected installation and save it in
/tmp.
- Red Hat Enterprise Linux/CentOS 6.8 64 bit RPM package: CTF-Disconnected-media-16.10.658-76.rhel6.x86_64.rpm
-
Unpack the disconnected installation package.
- rpm -Uvh <package-name>
-
Note: If the Red Hat Enterprise Linux/CentOS installation DVD is mounted already, skip the following instructions. If not, mount the DVD.Mount the Red Hat Enterprise Linux/CentOS installation DVD. The DVD contains the necessary software and utilities required for installing TeamForge without internet access.
In the following commands, replace "cdrom" with the identifier for your server's CD/DVD drive, if necessary.
- cd /media/
- mkdir cdrom
- mount /dev/cdrom ./cdrom/
If there are any spaces in the automount, unmount it first and mount it as a filepath, with no spaces.
-
Create a yum configuration file that points to the Red Hat Enterprise Linux/CentOS installation DVD.
- vi /etc/yum.repos.d/cdrom.repo
[RHEL-CDROM]
name=RHEL CDRom
baseurl=file:///media/cdrom/Server/
gpgfile=file:///media/cdrom/RPM-GPG-KEY-redhat-release
enabled=1
gpgcheck=0
-
Verify your yum configuration files.
- yum list httpd
- yum list apr
-
Install the following application packages.
-
Install the source code component.
- yum install teamforge-scm
-
To install the Git packages, run the following command.
- yum install teamforge-git
-
Install the source code component.
-
Copy the master site-options.conf file from server-01 and modify the
host token settings in the site-options.conf file.
HOST_server-03=subversion cvs gerritDOMAIN_server-03=my.scmandgit.domain.com
HOST_my.app.domain.com=app database datamart etl indexer codesearch binary reviewboard - Save the site-options.conffile.
-
Deploy
services.
- /opt/collabnet/teamforge/bin/teamforge provision
The "provision" command prompts for response before it bootstraps or migrates data during TeamForge installation and upgrade respectively. Enter "Yes" or "No" to proceed. For more information, see The teamforge script.
Do this on the TeamForge Application Server - server-01
- If you have CVS integrations, synchronize permissions post upgrade. See, Synchronize TeamForge source control integrations.
-
Run the TeamForge post installation script. For
more information, see post-install.py.
- /opt/collabnet/teamforge/runtime/scripts/post-install.py
Note: In case you face any Git-related issues while running the post-install.py script, see Post install fails for Git. What should I do?. - Install the Black Duck Code Sight license on the server where Black Duck Code Sight is installed. For more information see these instructions.
Do the following on the SCM and Git Integration Server - server-03
-
Run the TeamForge post installation script. For
more information, see post-install.py.
- /opt/collabnet/teamforge/runtime/scripts/post-install.py
Note: In case you face any Git-related issues while running the post-install.py script, see Post install fails for Git. What should I do?. -
Update the file permissions on your site's data.
- /opt/collabnet/teamforge/runtime/scripts/fix_data_permissions.sh
Note: This process can take a long time on sites with a lot of data.
Do this on the TeamForge Application Server - server-01
-
Update the file permissions on your site's data.
- /opt/collabnet/teamforge/runtime/scripts/fix_data_permissions.sh
Note: This process can take a long time on sites with a lot of data.
Do this on the EventQ Server (server-02)
- Upgrade EventQ. See Upgrade EventQ.
Do the following on the TeamForge Application Server - server-01
-
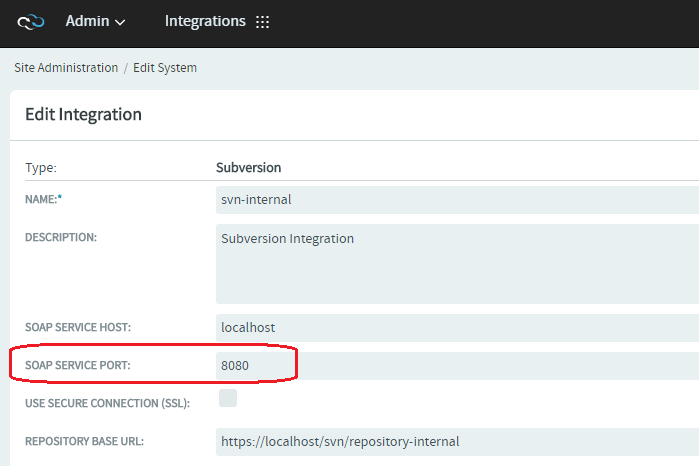
Use the following URL and set
the "svn-internal" SOAP SERVICE PORT to
8080 and click Save:
https://<hostname>/sf/sfmain/do/editSystem?systemId=exsy1001.
-
Apply the finishing touches and make sure everything is running smoothly after
upgrading to TeamForge
16.10.
-
Log on to the TeamForge web application using the default Admin
credentials.
- Username: "admin"
- Password: "admin"
- If your site has custom branding, verify that your branding changes still work as intended. See Change your site's look and feel.
- Let your site's users know they've been upgraded. See Communicate with all site users at once.
-
Log on to the TeamForge web application using the default Admin
credentials.
- TeamForge Avatar display issue on RHEL/CentOS 6.8
- TeamForge Avatar image is not displayed properly post Review Board
installation on RHEL/CentOS 6.8. Run
the following commands to work around this issue:
- yum erase python-imaging
- yum install teamforge
- service httpd restart
- EventQ: Run the add_eventq_to_projects.py script to add Eventq to existing projects.
- ETL initial load jobs: To run ETL initial load jobs, see ETL initial load jobs.
- Review Board: To upgrade Review Board, see Upgrade Review Board.
- SELinux: To run TeamForge in SELinux enabled mode, see Set up SELinux.
- Configure X-Frame-Options: Setting the X-Frame-Options header to ALLOW-FROM http://forge.collab.net overrides the default Jenkins configuration header settings and displays the page in an iframe on the specified origin. For more information, see Unable to embed Jenkins page into an iframe. How to fix it?.
- Caching with Memcached: Install Memcached