As a project administrator, you can configure your Kanban Board based on your project requirements.
Create Kanban Board states for the different stages of your project development process, specify workflow constraints for each state and map them to your tracker statuses.
-
In the List Trackers, Planning Folders and Teams page,
click Kanban.
The following message is displayed prompting you to configure a Kanban Board for the current project.

Kanban Board is not configured for the project.
-
Click the Kanban Board configuration icon to open the
Settings window.
 Note: Use the configuration icon when you create a Kanban Board for the first time or when you want to modify the settings of your current Kanban Board.
Alternatively, you can use Manage Boards to create a new board.

For more information about its usage, see Manage Boards.
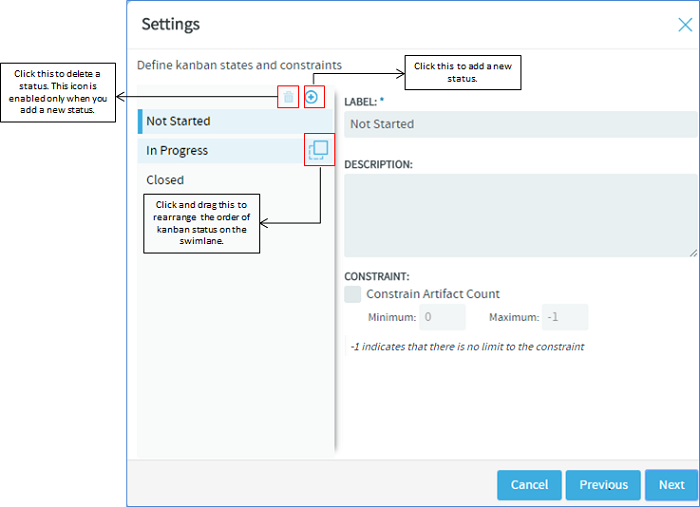
Kanban states and constraints
A kanban state is the status of a work item in a value stream (swimlanes). The constraints or the limits that you specify here dictates the behaviour of the board. These are checkpoints which eventually help you track the progress of a work item, identify bottlenecks and fix them. The default kanban statuses are 'Not Started', 'In Progress' and 'Closed'.
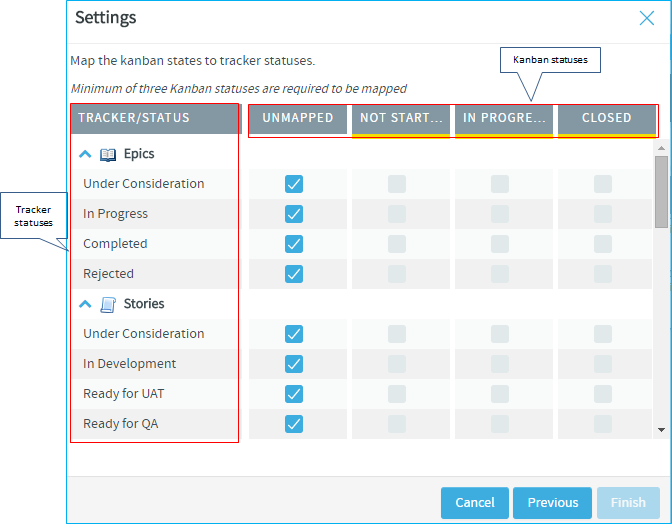
Map kanban states with tracker status
Next, make a logical mapping of the kanban states with the tracker statuses to view those tracker artifacts on your Kanban Board. For example, to view defects, you must first make a meaningful mapping of the kanban states with the defect tracker status(es). The mapped kanban states appear as swimlanes on the Kanban Board.
- You need to map a minimum of 3 kanban statuses.
- You can map a single kanban status to one or more tracker statuses, but you cannot map a single tracker status to more than one kanban status.
-
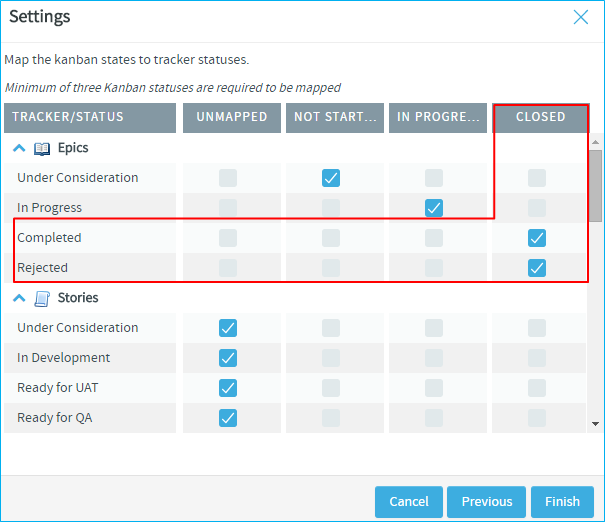
Click the appropriate check box. For example, for an Epic tracker, map
'Completed' and 'Rejected' tracker statuses with the Kanban statuses 'Closed' by
selecting the appropriate check boxes as shown in the following
screenshot.
Manage Boards
You can create and manage multiple kanban boards per your requirement. As a project administrator, you may want to create multiple boards at the iteration level, at each unit level, (Dev, QA and so on), at the hierarchical level or at each project team level, depending upon the needs of the users. For example, to get the big picture and make executive decisions you may want to create a kanban board at the management level; at the same time, at a project member level, you can create a board to focus on the immediate tasks to be completed.
-
Use the various icons available in Manage Boards to
maintain multiple kanban boards in a project.
To do this... Click this icon To use Manage Boards. To create a new board 
To edit a board 
To delete a board Note: You cannot delete the default Kanban Board. When you delete your current active board, the default one shows up automatically.
To set a default board 