Install TestLink on the same TeamForge server

You may choose to install TestLink on the same server as that of TeamForge or on a different one.

This section explains how to install TestLink on the same TeamForge server. .
Warning: It is highly recommended to install TeamForge on a two box setup to isolate TestLink from TeamForge as CollabNet supports the integration and not the TestLink software.

  1. Download the following files and save them in the TeamForge server, for example, in the /var/ops/ folder:
  2. Untar the ctf-testlink-singbebox-2.1.3.tar file to the /opt/collabnet directory.
    • cd /opt/collabnet/
    • tar zxvf /tmp/ctf-testlink-singbebox-2.1.3.tar
  3. Modify the install.conf file values given in the following table to suit your installation environment.
    • cd testlink-installer/
    • vi installer/install.conf
    Option Description
    testlink_download_location=/tmp/testlink-1.9.11.tar.gz The full name of the TestLink tar file and the location from where it was downloaded.
    testlink_dir=/opt/testlink The path of the directory where the TesLink files and libraries are installed.
    domain=<domain name or host name> The TestLink site information. For example, cu064.cloud.maa.collab.net.
    database_name The MySQL database for TestLink.
    database_user The MySQL database user for TestLink.
    ctf_base_url The absolute URL of the site that you want to associate to.
    ctf_site_var_dir=/opt/collabnet/teamforge/var The path of the directory where the TeamForge files exist.
  4. Install the TestLink application.
    1. Run the following command:
      • cd /opt/collabnet/testlink-installer
      • ./install.py -i
    2. The following text will appear prompting you to provide the MySQL root user password and the TestLink application database password:
      • "Enter mysql password for 'root' user:"
      • "Enter mysql password for testlink database:"
        Note: For both the above-mentioned prompts, if you are a first time user, enter a new password. However, for subsequent upgrades, you must use the same password because you will not be allowed to enter a new password again.
  5. Recreate the runtime. ./install.py -r
    Note: For every TeamForge migration or update, you must recreate the runtime for TestLink.
  6. Create a namespace for TestLink.
    1. Go to the TestLink installer directory.
      • cd /opt/collabnet/testlink-installer/installer/files
      • vi createnamespace.php
    2. Change the CTF_BASE_URL to point to the correct host.
    3. Provide the user name and password of any user with site administrator privileges.
    4. Run the following command: php createnamespace.php
      Note: You must run it only once for a TestLink installation.
    5. The following text will appear prompting you to provide the TeamForge administrator user name and password:
      • "What administrative user would you like to use to integrate TestLink to TeamForge": <TeamForge administrator user name>
      • "What is the password for the user you entered": <TeamForge administrator password>
  7. Restart TeamForge. /etc/init.d/collabnet restart
  8. From the /opt/collabnet/testlink-installer/installer/conf folder, upload the two configuration files testlink-application.xml and testlink-deploy.xml that enable the TestLink application to work as part of TeamForge. For more information on how to use them, see Configure TestLink for your TeamForge site.
  9. Next, you must migrate TeamForge users to TestLink by running the following script:
    • cd /opt/collabnet/testlink-installer
    • python migrate_users.py
    All TeamForge users are now available in TestLink.
    Note: Once the migration is done, every time new users are added in TeamForge, they are synchronized automatically with TestLink.
    Once the users are migrated to TestLink, the permission to access TestLink for migrated users has to be manually created in TeamForge. The following illustration shows the migration path:

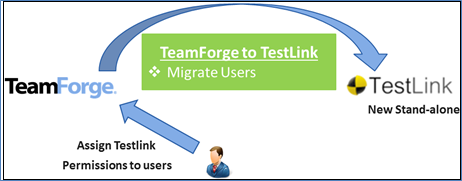
    If your data (MySQL database) resides in the NFS (Network File System) directory, and if it is a SELinux enabled box, then follow these steps.