You create a new connector scenario by specifying the details for the ScrumWorks Pro
system you're integrating with TeamForge.
In version 1.5.1 and earlier, this scenario was known as a "landscape".
-
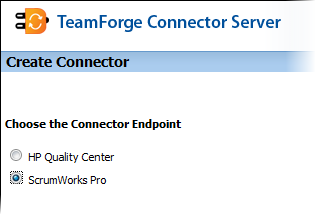
Bring up the TeamForge connector
server (CCF Master) by typing in its URL, for example,
http://cu078.cloud.sp.collab.net:8080/CCFMaster/.
-
In the Create Connector page, select the connector
participant (in this case, ScrumWorks Pro) and click
Next.
-
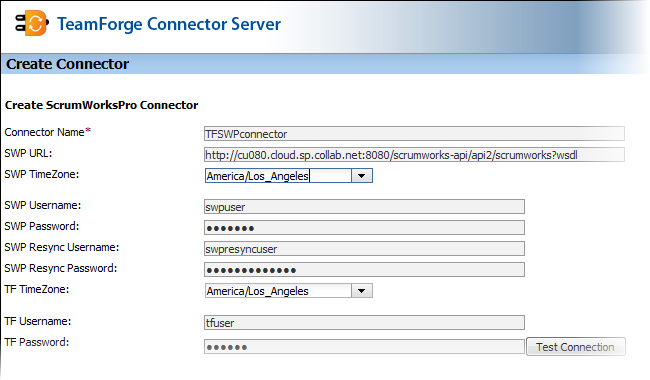
Provide a name for the connector.
-
Enter the URL of the ScrumWorks Pro WSDL. For example,
http://cu080.cloud.sp.collab.net:8080/scrumworks-api/api2/scrumworks?wsdl.
-
Specify the timezone for ScrumWorks Pro.
-
Specify the ScrumWorks Pro username and password.
Note: In order to avoid permissions conflicts in accessing ScrumWorks Products
via the TeamForge connector, the
user specified here should have Global Administrator privileges in
ScrumWorks Pro. This user account is the dedicated connector user for
ScrumWorks. It is important that no other user be allowed to log into the
system with this connector user's username and modify data.
-
Supply the Resync user's credentials.
Note: This account is different from the ordinary connector user account. For
more information on the dedicated Resync user, see
this wiki.
-
Specify the timezone for the TeamForge site.
-
Provide the TeamForge username and
password.
Note: This account refers to the dedicated connector user in TeamForge who has the requisite
permissions to access (read/write) the tracker involved in the mapping. It
is important that no other user be allowed to log into the system with the
connector user's username and modify this tracker's artifacts.
-
Click Save.
The connector will appear as an Integrated Application in the
TeamForge site specified in the connector's
configuration settings. Site
administrators can configure the connector's settings. Project administrators can add
the connector to their projects, and grant project members role-based access to the
connector.

