As the TeamForge site administrator, you can configure connector user details in your
ScrumWorks Pro, TeamForge, and Connector Properties screens.
(You can also configure these properties directly on the TeamForge connector server.)
-
Click Admin in the TeamForge toolbar.
-
On the Site Administration toolbar, click Integrated Apps.
-
Select the connector and click Administer (or
Configure in earlier versions of TeamForge).
-
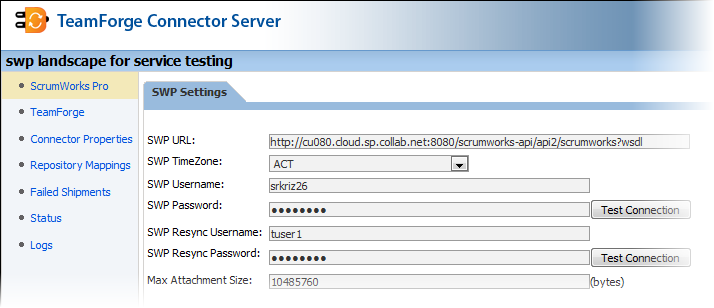
In the SWP Settings screen:
-
Enter the URL of the ScrumWorks Pro WSDL. For example,
http://cu080.cloud.sp.collab.net:8080/scrumworks-api/api2/scrumworks?wsdl.
-
Specify the timezone and maximum size for attachments.
-
Specify the ScrumWorks Pro username and password.
Note: In order to avoid permissions conflicts in accessing ScrumWorks Products via
the TeamForge connector, the user specified here should have Global Administrator
privileges in ScrumWorks Pro. This user account is the dedicated connector user for
ScrumWorks. It is important that no other user be allowed to login into the system
with this connector user's username and modify data.
-
Supply the Resync user's credentials.
Note: This account is different from the ordinary connector user account. This user
account is the dedicated Resync user.
-
Save your changes.
-
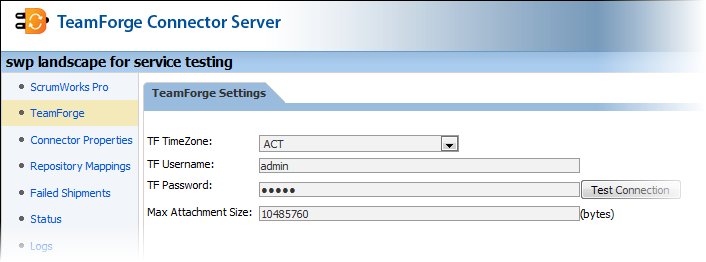
In the TeamForge Settings screen:
-
Specify the timezone and maximum size for attachments.
-
Provide the connector username and password.
Note: This account refers to the dedicated connector user in TeamForge who has the
requisite permissions to access (read/write) the tracker involved in the mapping. It
is important that no other user be allowed to log into the system with the connector
user's username and modify this tracker's artifacts.
-
Save your changes.
-
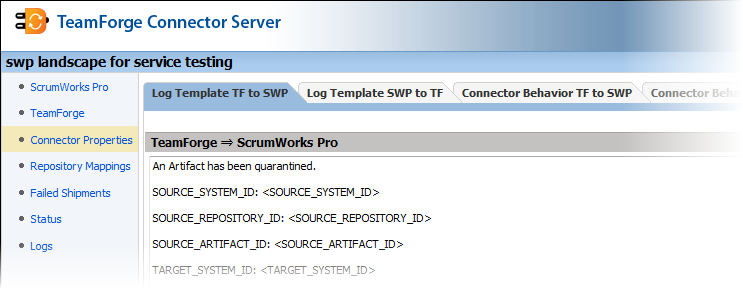
In the Connector Properties tabs, provide these details.
-
Specify whether synchronization in a particular direction should happen on starting
the connector
-
Edit the default log template as required.
-
Save your changes.