As the site administrator, you can configure connector details in the HP Quality Center, TeamForge, and Connector Properties screens.
(You can also configure these properties directly on the TeamForge connector server.)
- Click Admin in the TeamForge toolbar.
- On the Site Administration toolbar, click Integrated Apps.
- Select the connector and click Administer (or Configure in earlier versions of TeamForge).
-
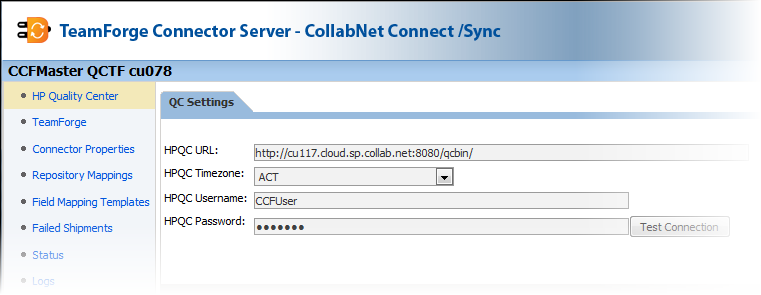
In the QC Settings screen:
- Enter the URL of the Quality Center server. For example, http://cu117.cloud.sp.collab.net:8080/qcbin/.
- Specify the timezone for the Quality Center server.
-
Specify the Quality Center username and password.
Note: The Quality Center user needs TDAdmin permissions.
- Save your changes.

-
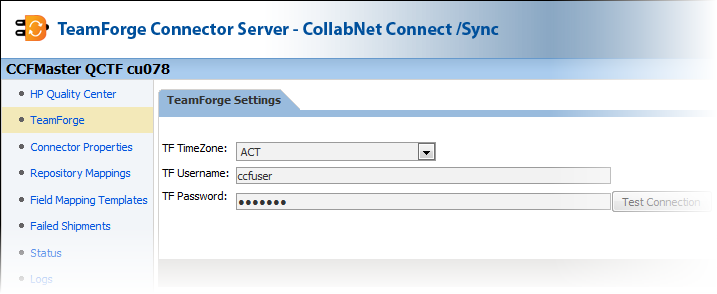
In the TeamForge Settings screen:
- Specify the timezone for the TeamForge server.
-
Provide the TeamForge username and
password.
Note: This account refers to the dedicated connector user in TeamForge who has the requisite permissions to access (read/write) the tracker involved in the mapping. It is important that no other user be allowed to log into the system with the connector user's username and modify this tracker's artifacts.
- Save your changes.

-
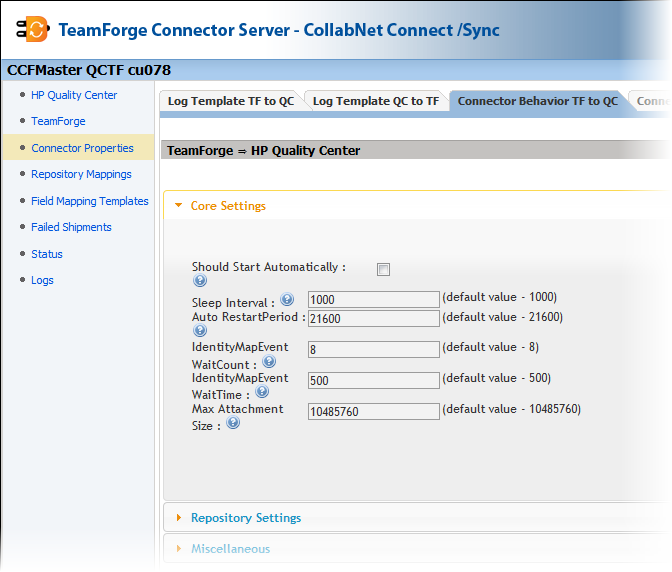
In the Connector Properties tabs, provide these details.
- Edit the default log template as required.
-
Define the core connector settings. For example, you can specify whether
synchronization in a particular direction should happen on starting the
connector.
 Tip: If you experience problems during the initial resynching of artifacts, try increasing the value of the Identity Map Event Wait Count and Identity Map Event Wait Time settings.
 -
Define repository settings, for example, whether attachments should be shipped in a
particular direction.
Note: Turning on the settings to ship human-readable names for the planning folder and technical release IDs may impact performance because more SOAP calls would be required.
- Save your changes.