Let's say you are in a planning meeting and want to create new user stories, make changes to existing ones, or break the user stories into tasks, all in real time. The Project Plan Editor has several features that facilitate quick updates to your data.
Note: All your actions and edits are local until you save the artifact table. Unsubmitted changes are shown with a blue background.
-
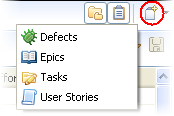
To add a new artifact, click the Submit new artifact in icon and select a tracker.
Enter a title and description for the artifact and click OK.

-
To add a child artifact to an existing artifact, right-click the artifact table row for the parent artifact.
- Select New child artifact in and the tracker.
- Enter a title and description for the artifact and click OK.
Tip: You can drag and drop artifacts to establish dependencies. -
To update an artifact, select it in the artifact table and make your changes in-place.
You can edit Status, Priority, Assigned To and Effort fields. You can also specify whether effort should be automatically calculated.
Note: If you have selected Calculate Effort, you cannot edit that artifact.Tip: You can do a mass update of artifacts -- select the artifacts you want to modify, right-click and select Mass Update, and make your changes in the Update Artifacts dialog. -
To save your changes, click the Save changes to artifact table icon.
Enter an optional comment and click OK.
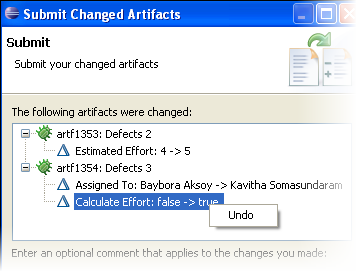
 Tip: The Submit Changed Artifacts dialog displays all your local changes. To selectively save some of your work, right-click on a change that you want to discard and click Undo.
Tip: If you want to work only with the artifact table, you have options to hide the planning folder and backlog panes.

