As a TeamForge project administrator, you can configure multiple planning boards for a project. You might do this if you want to restrict the tracker types that can be displayed, or if you want to configure the layout of the fields that can appear on the artifact cards.
However, configuring a planning board is optional. You do not have to set one up
because there is a default layout that includes everything.
-
To configure the planning board, right-click the project and choose
Configure Planning Board ....
The planning board configuration screen appears.
-
To create a new configuration, click Add.
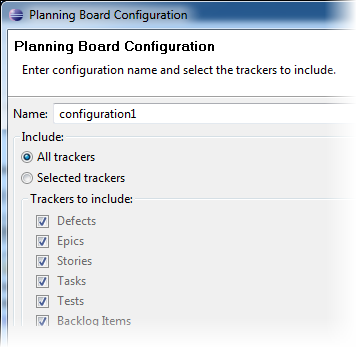
- Provide a name for the configuration.
-
Select the trackers whose fields you want to configure.
If you select the All trackers option, any new tracker you create will be automatically included in the planning board without you having to reconfigure the board. This option is available with version 4.0 of the Desktop.
- Click Next.
-
Select a tracker.
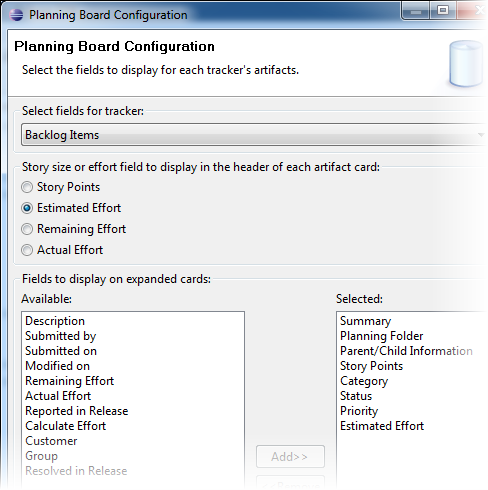
- Indicate which field you want to use to specify the story size. Typically, you would use either Story Points or Estimated Effort.
- Select the fields you want displayed on expanded cards. Non-expanded cards display just the Agile-focused fields: title, description, assigned user, story size and the planning folder the artifact belongs to.
Note: The fields you select here apply only to the tracker shown in the Select fields for tracker dropdown. If you have several trackers and want a different configuration for each, you need to select each tacker and specify its fields. If you want the same configuration for all trackers, just specify the fields for one tracker and then select the Apply these choices for all trackers option.When you're done, click Next. -
Specify the fields you want displayed for planning folders.
These fields are displayed when a planning folder is expanded in the planning
area of the planning board.
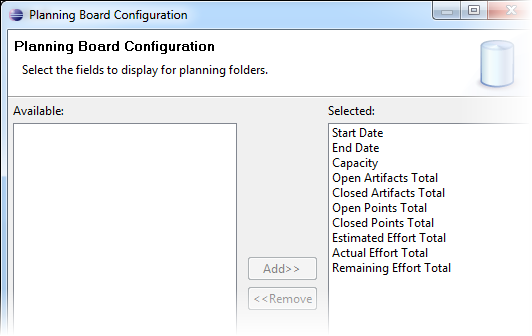
Click Next.
-
Select the project members to whom artifacts can be assigned. If you want to include a subset of users rather than all project members, click Add and include them.
Note: If you included selected users, only the artifacts assigned to those users will appear on the planning board. If you want unassigned artifacts displayed, select the “None” user as well.

- Click Finish.