To start working with your TeamForge projects within your Desktop, first add the TeamForge site to the CollabNet Sites view. You'll get Agile planning and task boards, the special Desktop editor, and various collaboration tools.
-
In the CollabNet Sites view, click the Add
CollabNet Site icon.

The Add CollabNet Site wizard opens. - In the Add a CollabNet Site dialog, select CollabNet TeamForge for the site type and click Next.
- Enter the URL for the site. For example, https://forge.collab.net/
- Provide a description and click Next.
-
Enter the user name for your TeamForge account.
Note: Even if you are using a client certificate for authorization, it is important that you provide your actual user name here. The user name you enter is used as the selection criteria for the built-in "Assigned to me" and "Submitted by me" queries.
-
Specify the kind of client authorization required to connect to the TeamForge server.
- If you are not using a client certificate, select Basic and enter your password for the site.
- Otherwise, select Certificate.
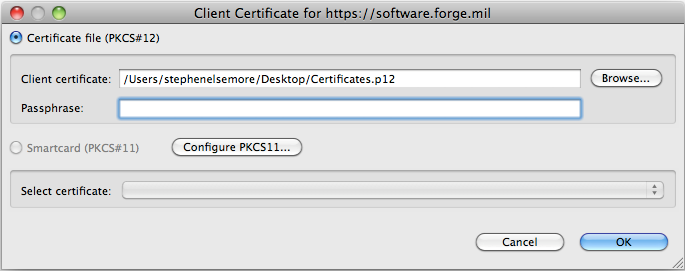
The certificate selection dialog appears. Here's an example.
Depending on whether you want to use a certificate file or a smartcard for authorization, do one of the following:
- Select Certificate file (PKCS#12), and provide a Client certificate file and passphrase.
- Select Smartcard (PKCS#11) and select a certificate from the dropdown.
- Select a timezone for the TeamForge server.
-
Select which projects you want to see in the CollabNet
Sites view once you've added your site.
- All projects on the site
- Only the projects in which you're a member
- The projects which you specify as favorites
- Click Finish.
Your TeamForge site appears in the
CollabNet Sites view. You can expand it to see the projects and
application folders in each project.